


How to make an electric guitar/electric bass
DIY electric musical instruments is a systematic project involving a great deal of interdisciplinary knowledge and skills, such as manufacturing processes, materials science, and analog electronics knowledge related to circuitry. Another important prerequisite for DIY instruments is that you can play the instrument and have considerable experience with its tones; for example, with electric guitars, you need to be familiar with the tones of Gibson, Fender , and other brands.
Then there's the level of DIY. I divide it into three levels:
Level A: Highest level of DIY. This means all parts are made from raw materials or the smallest components. For example, wooden parts are made from raw wood planks, electrical circuits are designed and soldered by the user, and even some metal parts, such as the bridge, are designed and manufactured by the user. In other words, more than 90% of the components and processes of the entire instrument are DIY.
Level B: Moderate DIY. Due to a lack of specific skills or knowledge, some components had to be purchased as finished or semi-finished products. For example, lacking woodworking equipment and skills, the neck and body were purchased as finished or semi-finished products for finishing, or lacking electrical knowledge, the guitar's circuitry was purchased and installed directly without soldering. In other words, more than 50% of the guitar's parts and processes were DIY-made.
Level C: Low-level DIY. Simply put, you buy a kit and assemble it yourself. You don't design or make any parts yourself; you only do the assembly.
Okay, now that we've defined the three levels of DIY, it's clear that if you want a certain level of fun, the highest success rate, and some cost reduction, then the wise choice is level B, which offers a moderate level of DIY.
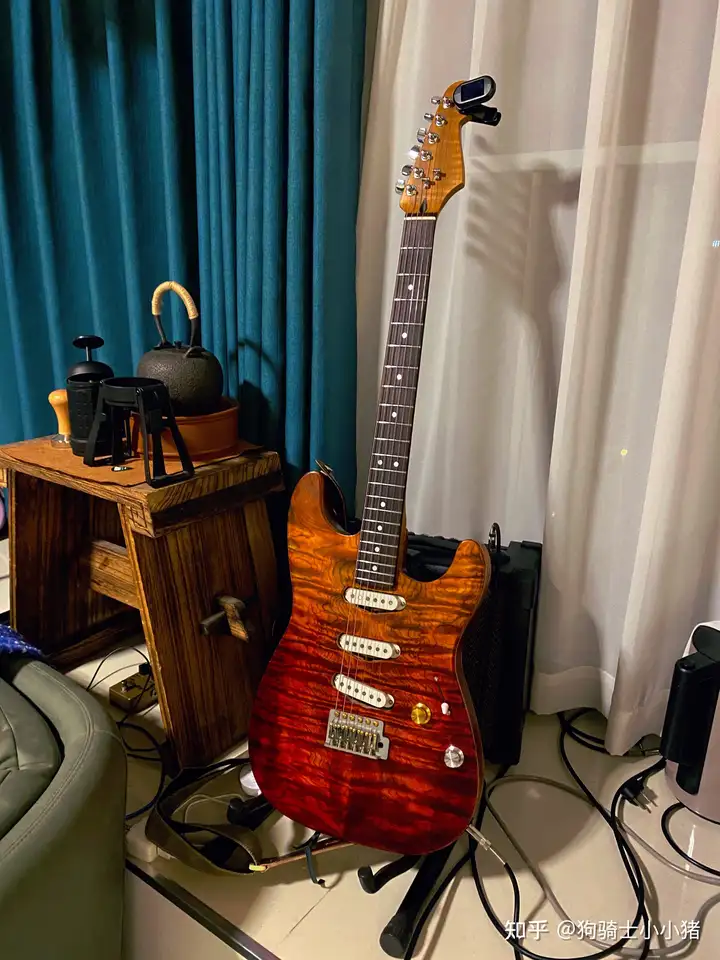
Don't underestimate B-mode DIY; B-mode is actually quite hardcore. Let me give you an example using one of my DIY electric guitars:
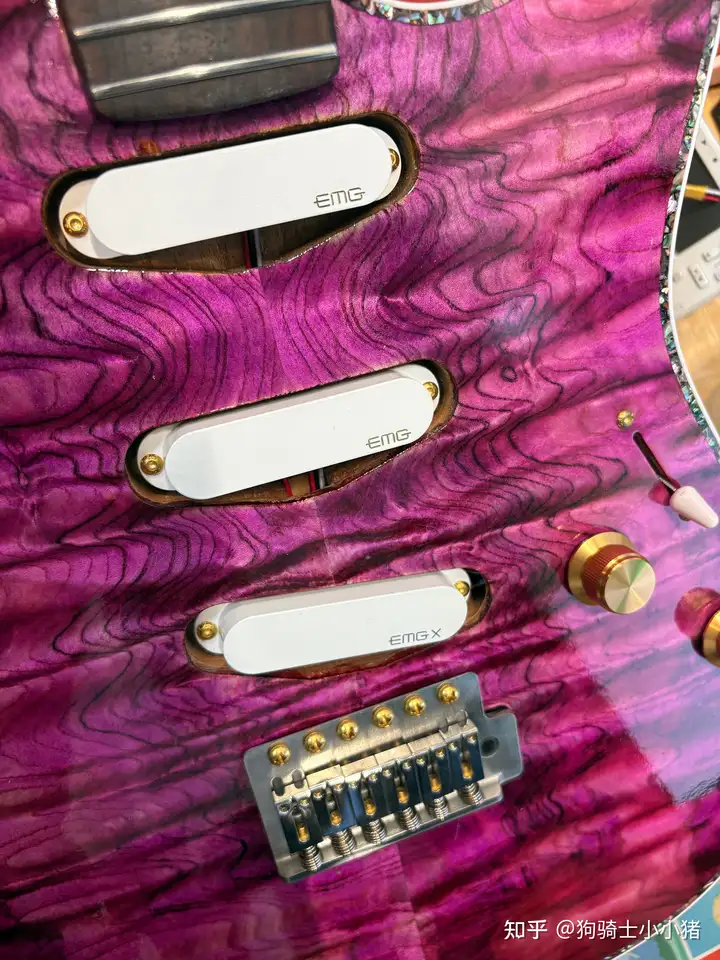
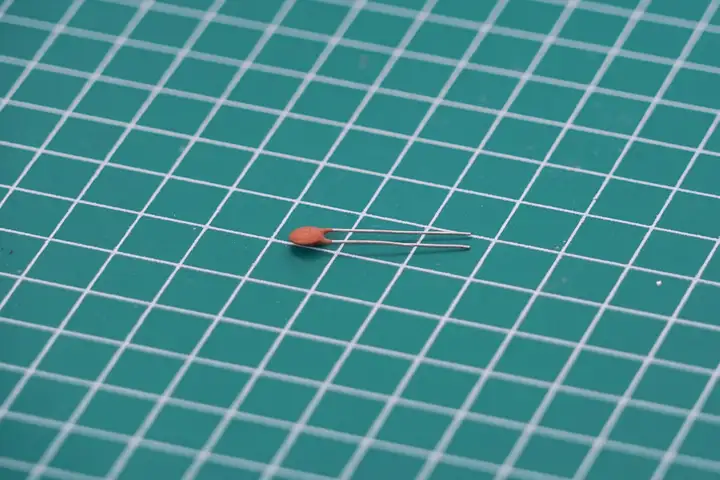
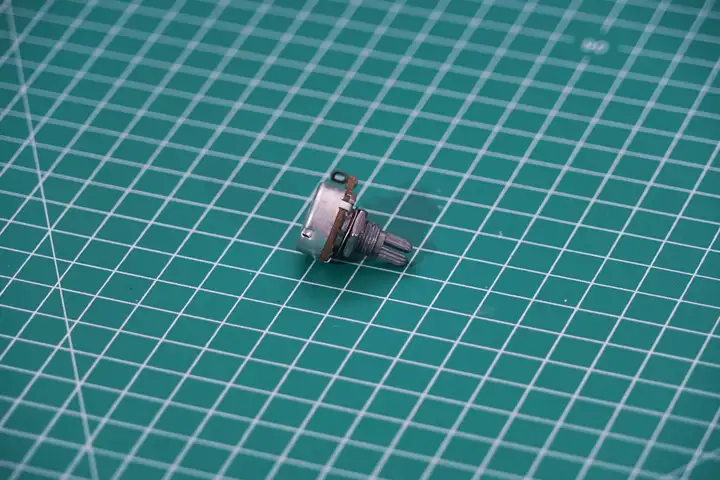
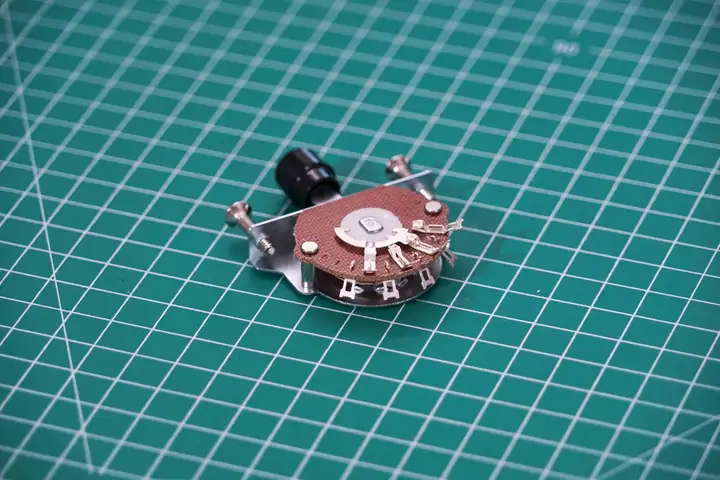
First, the purchased finished parts include: three single-pickup components , piano knobs, various bolts, bridge base, bridge springs, knob caps, capacitors, resistors, potentiometers, and other components.
The purchased semi-finished parts include: one Suhr guitar body and one Farida stock neck.
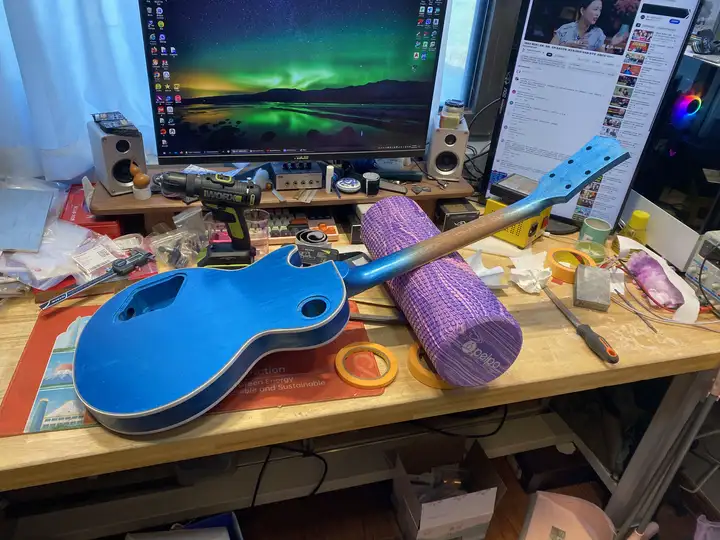
First, let's complete the construction of the instrument body.
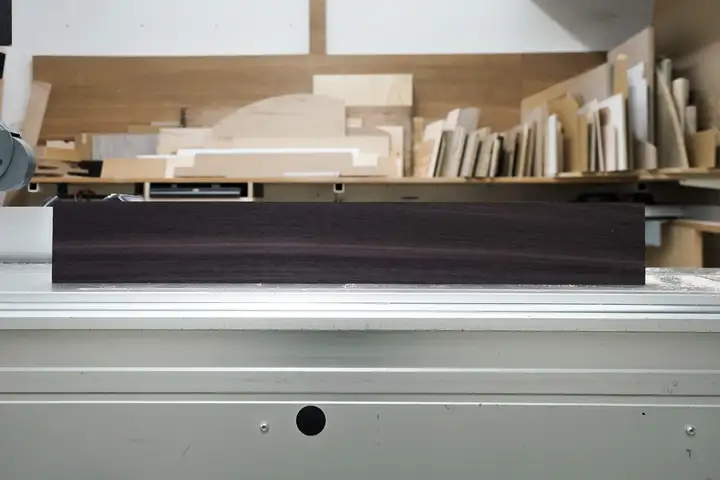
This is what the unfinished instrument body looks like:
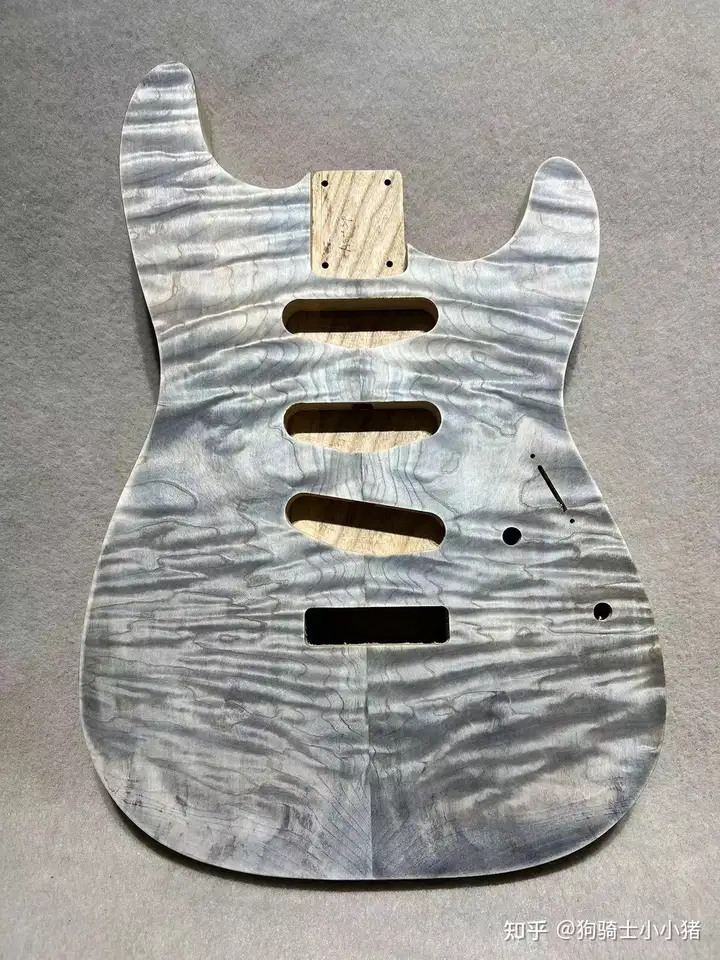
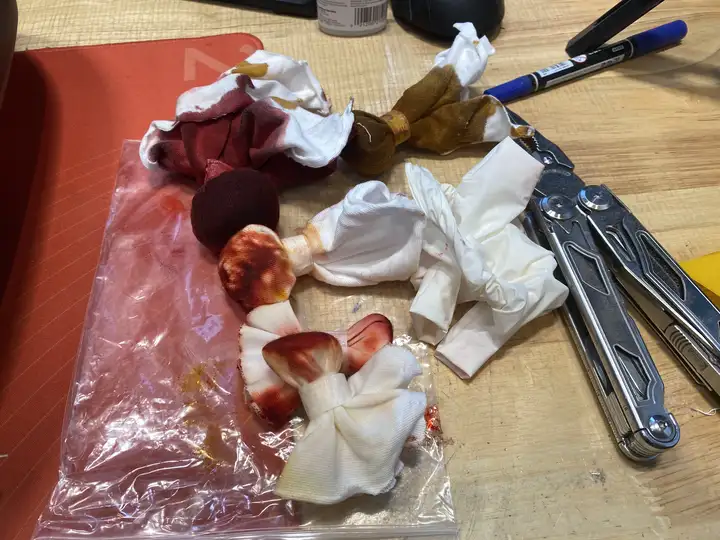
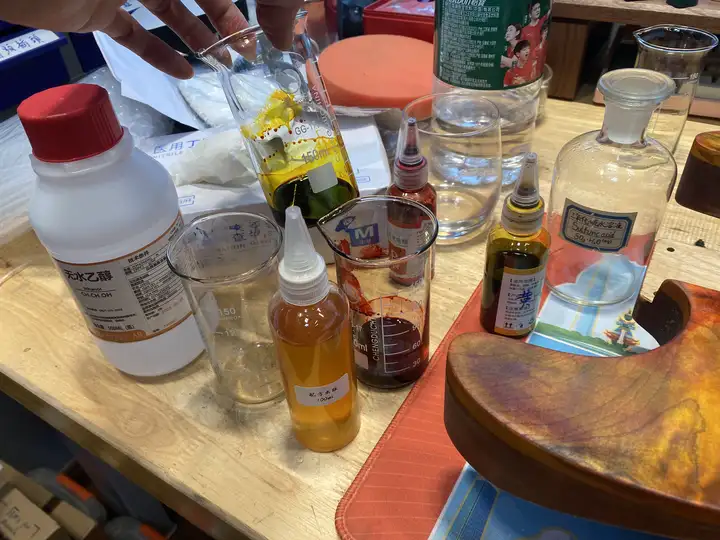
Two pieces of alder with a 5mm tiger-striped maple veneer, which is considered a mid-range configuration. First, sanding is done using power tools or hand sandpaper until a satisfactory finish is achieved. Then, the finishing touches begin. I opted for staining and shellac varnish.
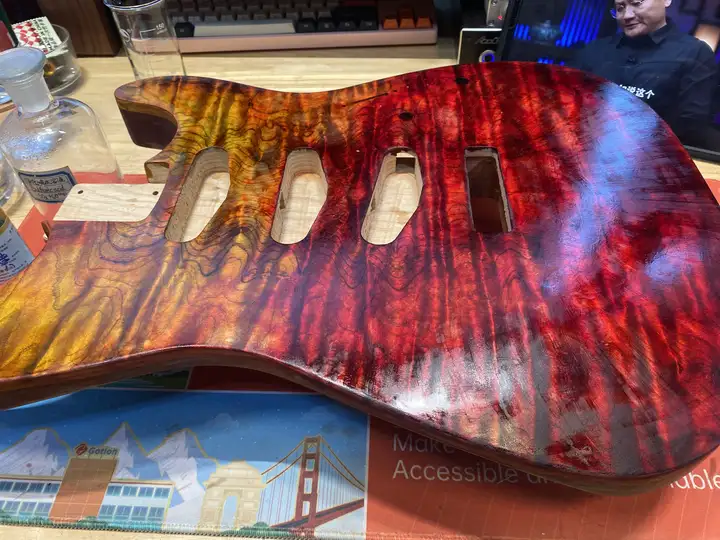
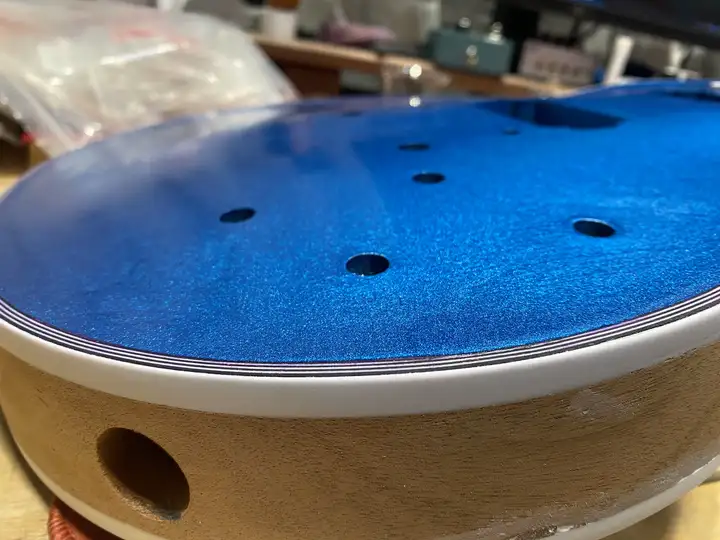
At this point, the guitar body is complete. There are many small details, such as the holes and the need for embedded brass nuts on the pickup mounting bolts. These involve considerable technical skill, and each could be the subject of a separate answer. While it may seem simple at first glance, the actual work on the appearance alone is quite demanding and enjoyable.
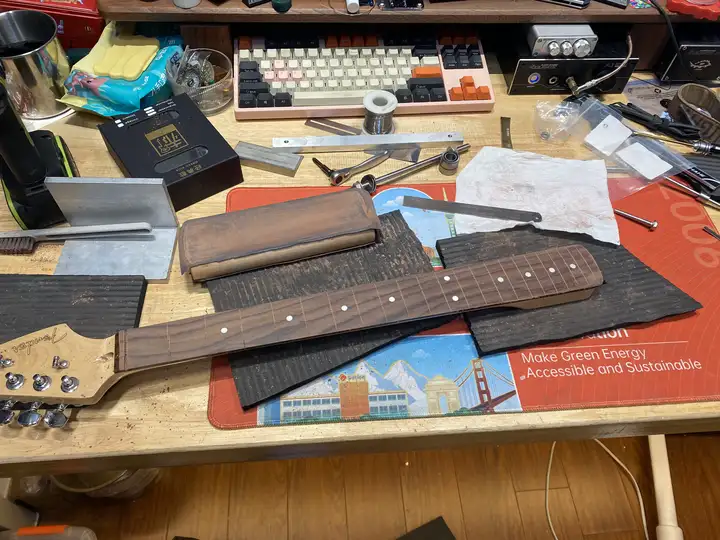
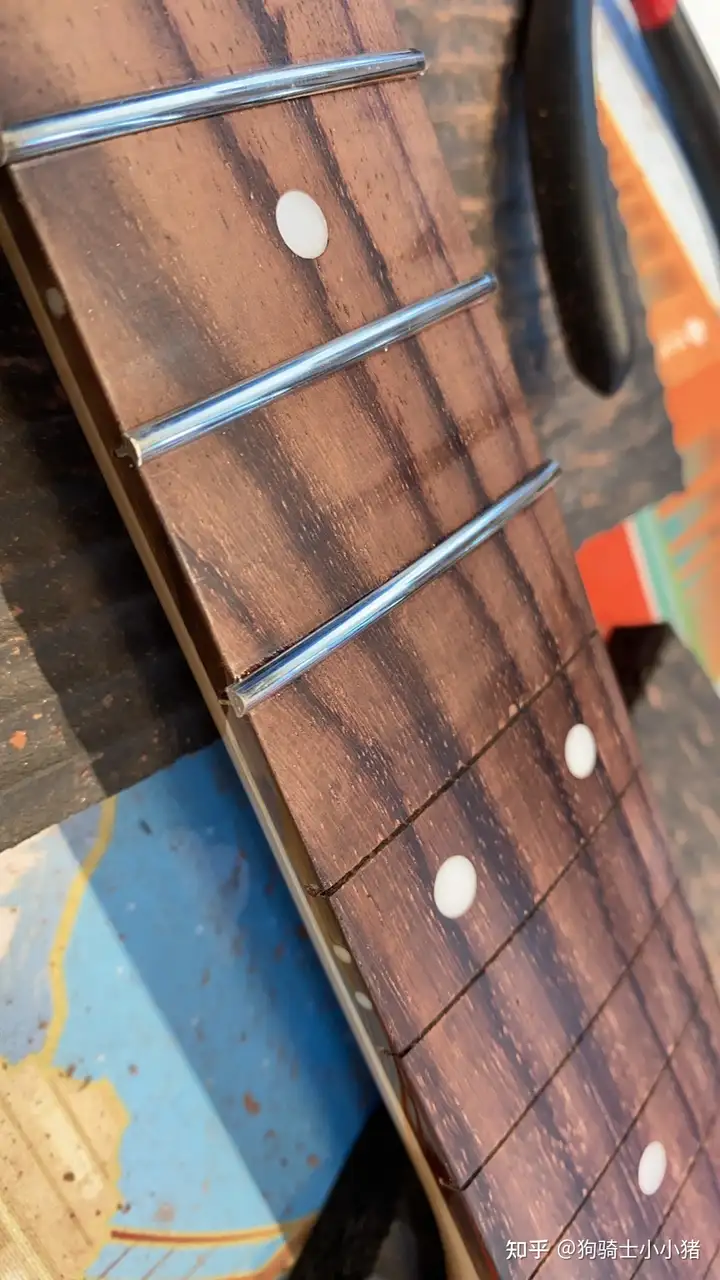
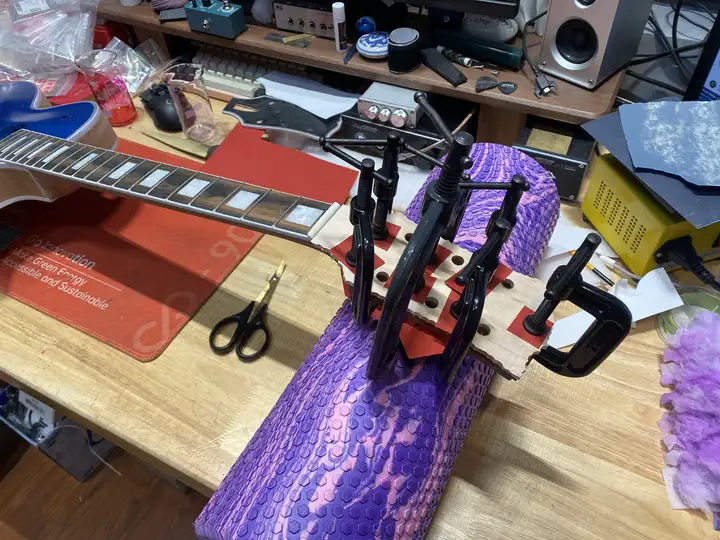
Next comes the completion of the neck. This mainly involves sanding the fingerboard curvature and installing the frets. This step is also quite demanding.

Finally, there's the design of the guitar circuitry.
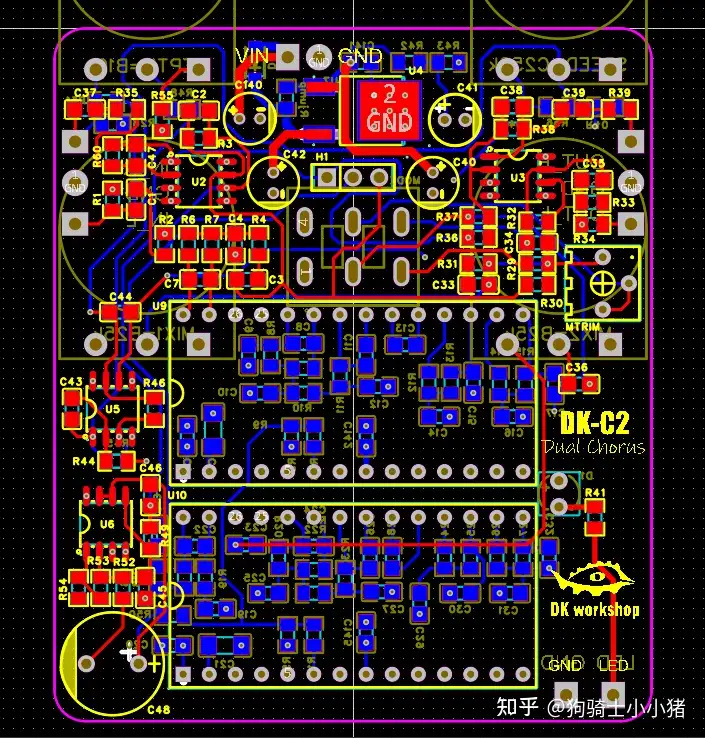
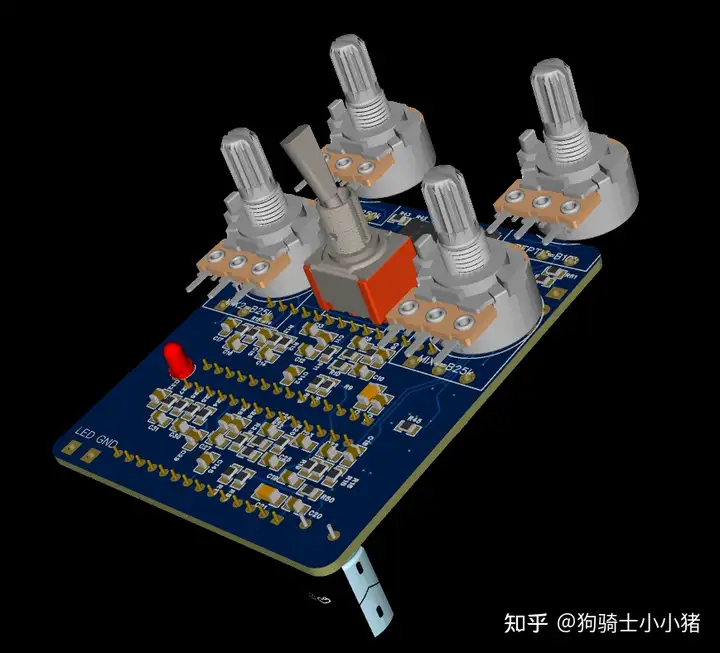
Oops, sorry, wrong picture. This is a pedal I designed myself ; guitar circuitry certainly isn't this hardcore.
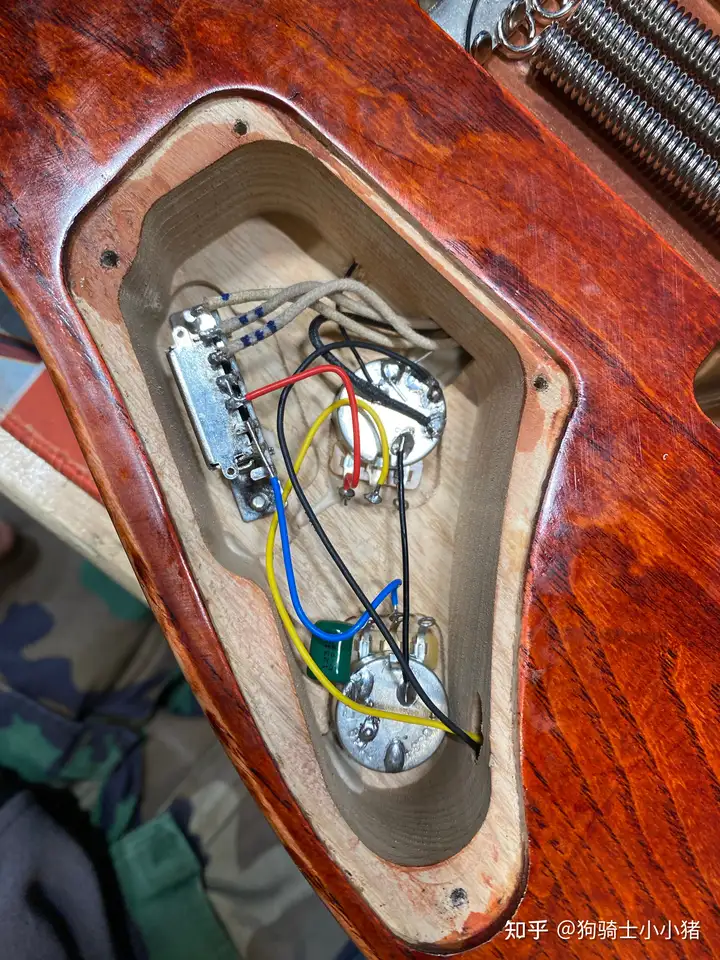
You can just solder it yourself; this is the easiest step for me, as I'm a hardware engineer.
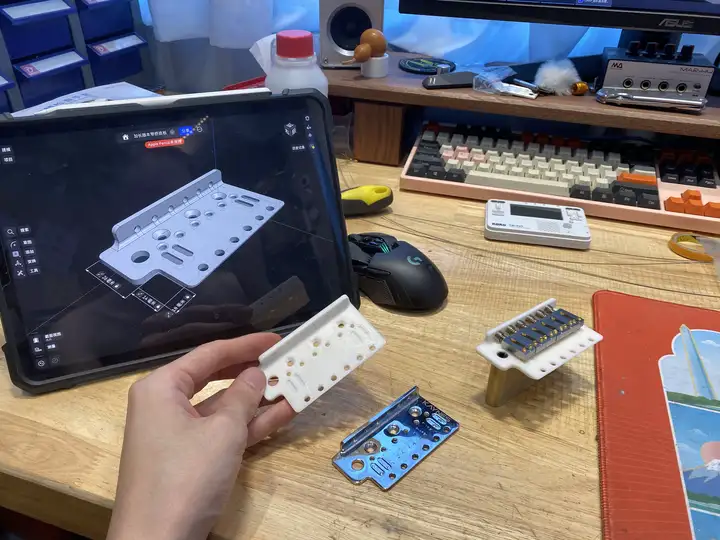
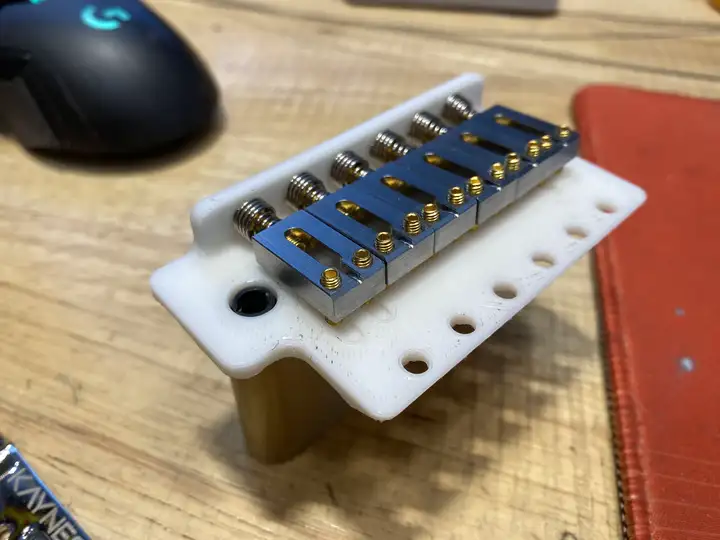
Next up is the hardcore industrial part: DIY piano bridge. You could easily buy a ready-made one, but I didn't; I insisted on making it myself. I bought a Lute piano bridge, measured the dimensions, modeled it, printed the plastic part myself, repeatedly modified and matched it, and finally printed the stainless steel version.
Finally, there's the fabrication of various covers. For the circuit compartment cover, I chose a 3mm thick forged carbon steel plate .
Once all the components are installed together, it's basically done.
Finally, there's the fine-tuning, such as string spacing, octaves, etc., which is actually quite challenging. It requires a thorough understanding of how strings work.
That's roughly the DIY process. Good luck with your DIY!
One more detail: you can really make a lot of money by spray painting yourself.
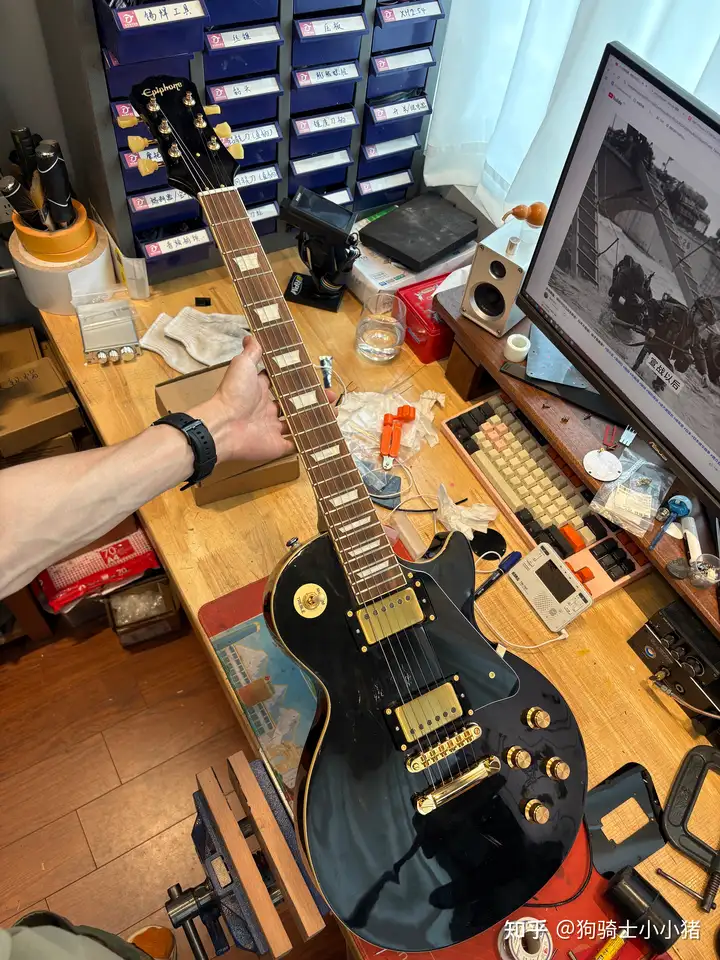
Finally, one more thing: for DIY beginners, I recommend starting with St. St. has a wide variety of parts, is inexpensive, and you won't feel bad if you mess it up. The LP (Linger) shape is more difficult to make, takes longer to complete, and is more expensive, so I don't recommend beginners try the LP. Here are a few pictures of my DIY LPs:
2025-09-12
It's quite interesting how they keep messing around with things; they're experts at it.
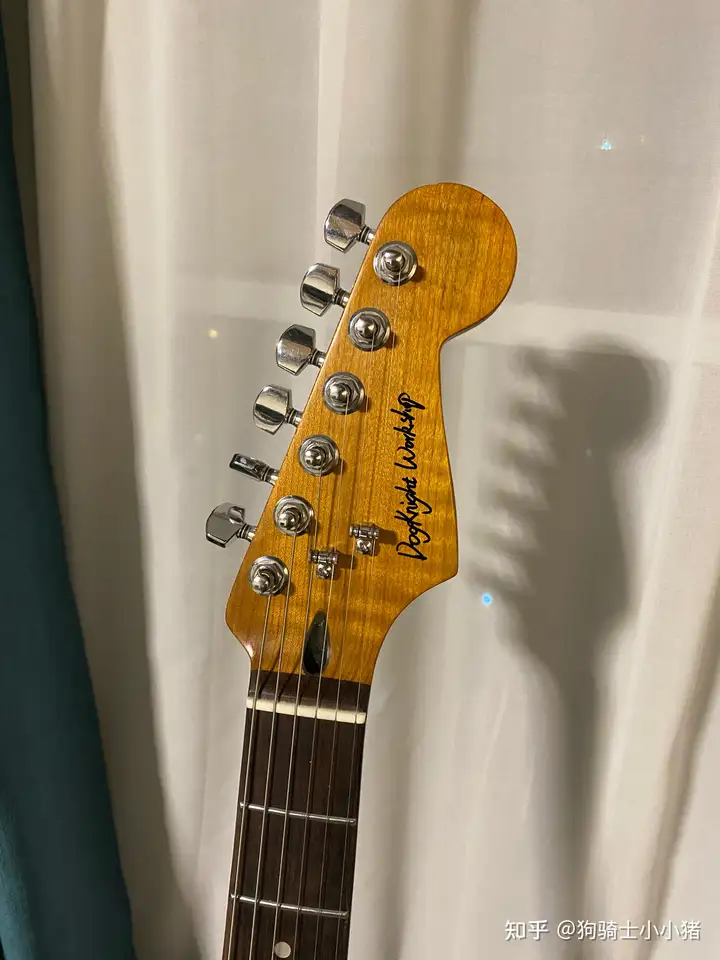
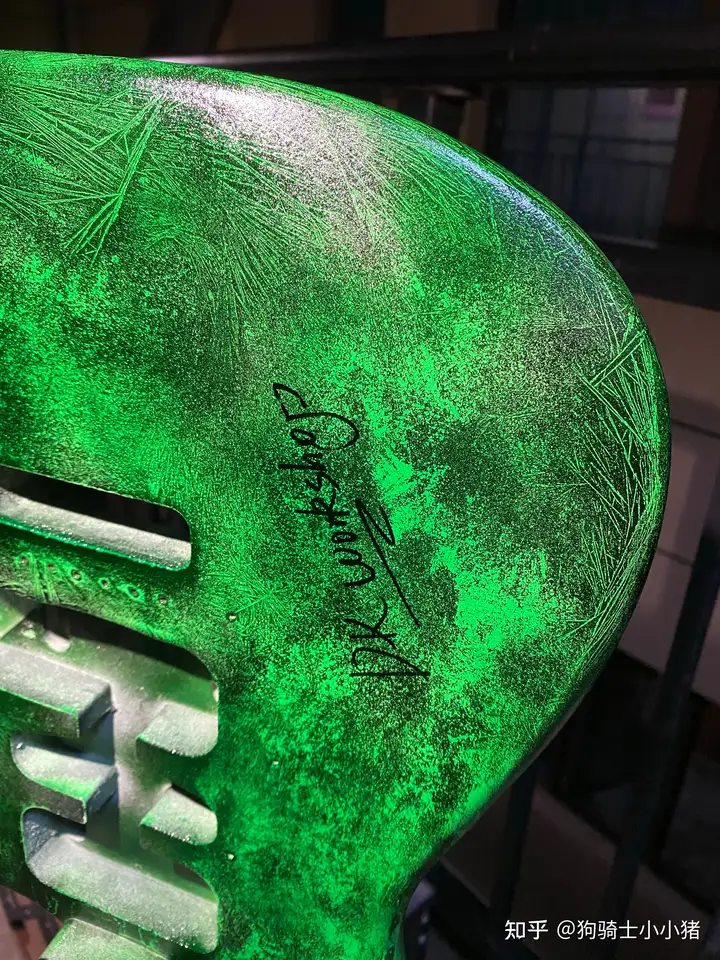
The edging on this ST was done by myself.
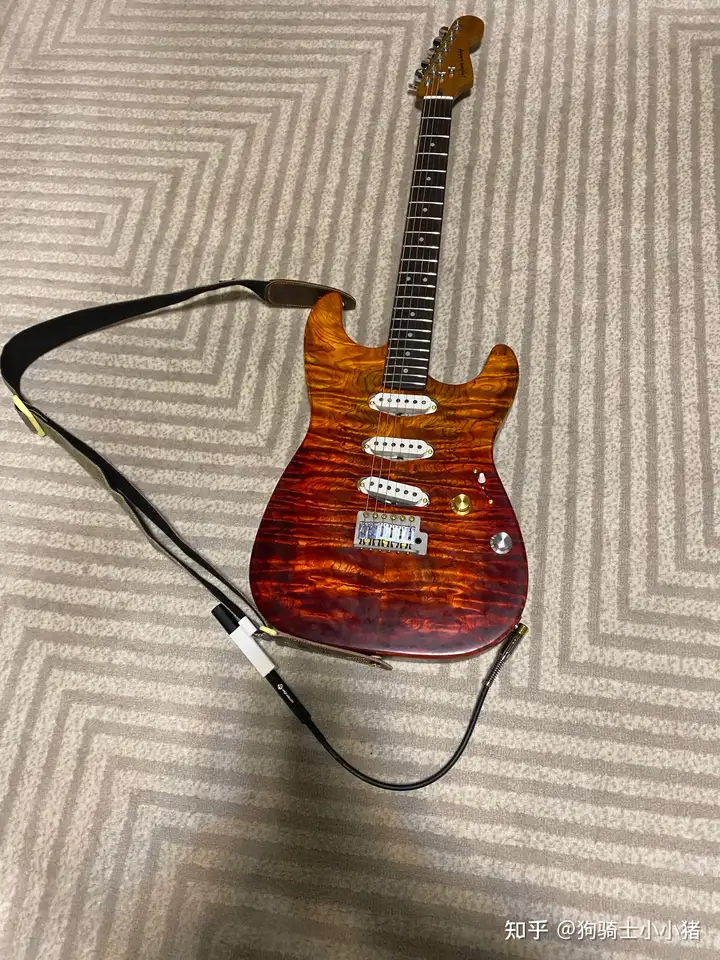
I bought this black card guitar for 300 RMB on Xianyu (a second-hand marketplace) and it's a fake Yipufeng guitar body. After some tuning and repairs, it's playable. This fake guitar is my main guitar now (it might not actually be fake).

More answers

I'm currently planning to create a musical instrument installation piece, which utilizes many electric guitar-making techniques. So, I'm going to first make a real electric guitar to accumulate some basic skills. This topic is relatively niche in China, and it's been eight years since the original question was asked. However, considering the lack of reliable information on the Chinese internet, I'm just offering this as a starting point and will update it gradually.
Having a certain level of English reading ability is essential, since Americans are generally the best at this. Many minor details that might hinder your progress are discussed extensively on English forums, and many DIY tutorials on YouTube are also in English. Therefore, it's important to know English.
Having a certain economic foundation is essential. Making an electric guitar is a systematic project, which can actually be broken down into several industries, such as music, woodworking, electronics, and painting. If you can master many of these sub-steps, you can make a living from it. Of course, this involves the use of a large number of tools, and both purchasing the necessary equipment and finding a place to store it require money. Since I'm studying at an art college, the school's woodworking workshop provides some large equipment, so I only need to buy some specialized guitar-making supplies. Even so, the cost is not low.
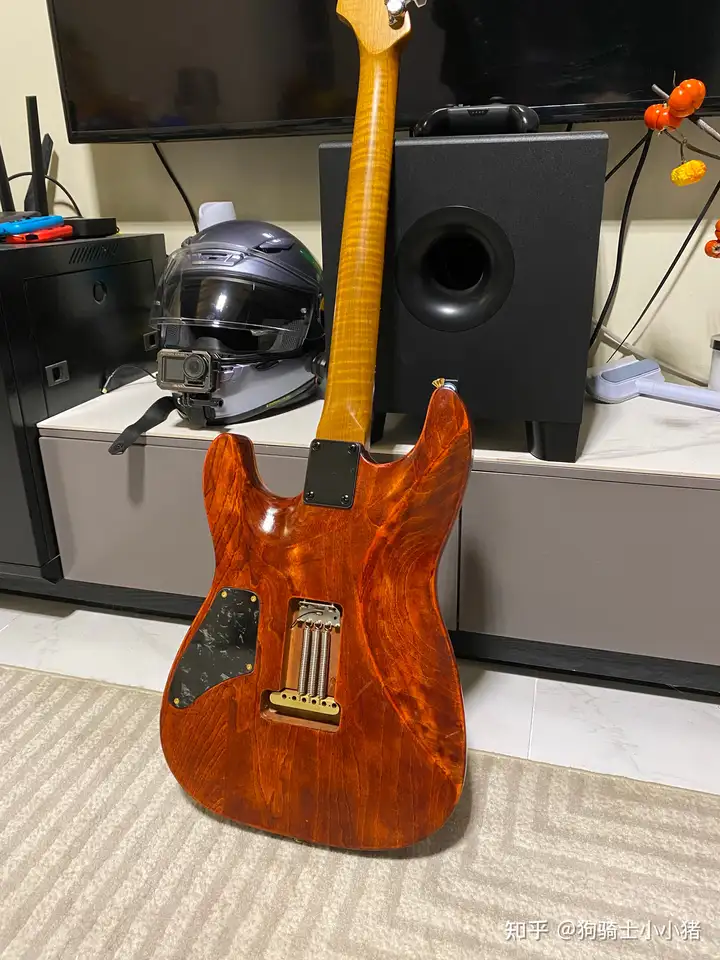
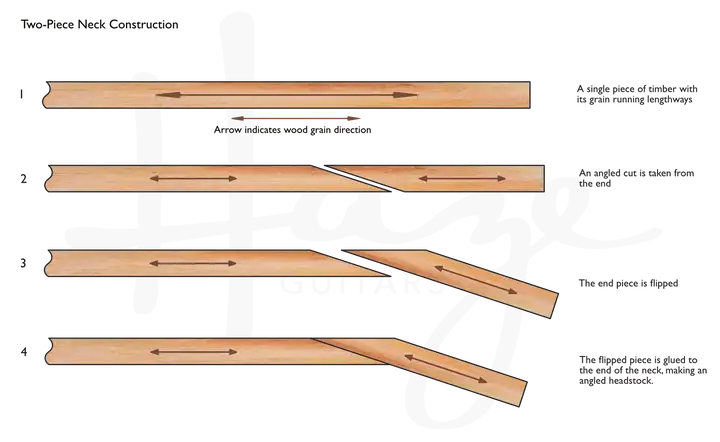
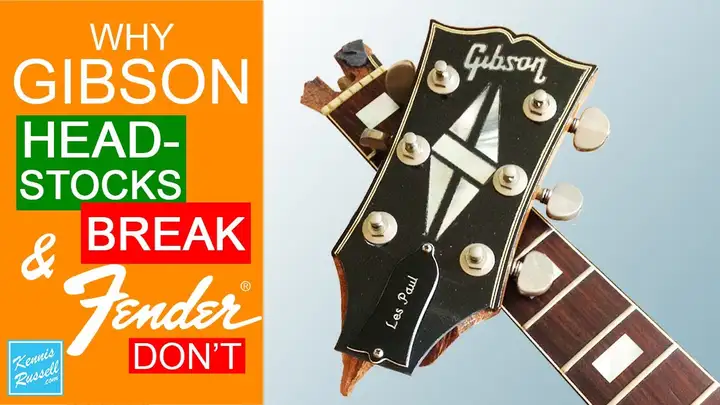
First, the raised neck was eliminated. Les Paul used a violin-like headstock in his electric guitar designs, using the raised neck to bear the string tension (which is said to also enhance sustain). Leo Fender abandoned this tradition, instead using string tension pins in the headstock to provide additional tension to the treble strings. The advantages of this are obvious: reduced manufacturing costs. After all, the LP's headstock required an additional gluing process, while Fender's headstock only required trimming off excess wood. It also reduced the risk of headstock breakage. The 17-degree raised neck for Gibson not only increased costs but also led to frequent headstock breakages.

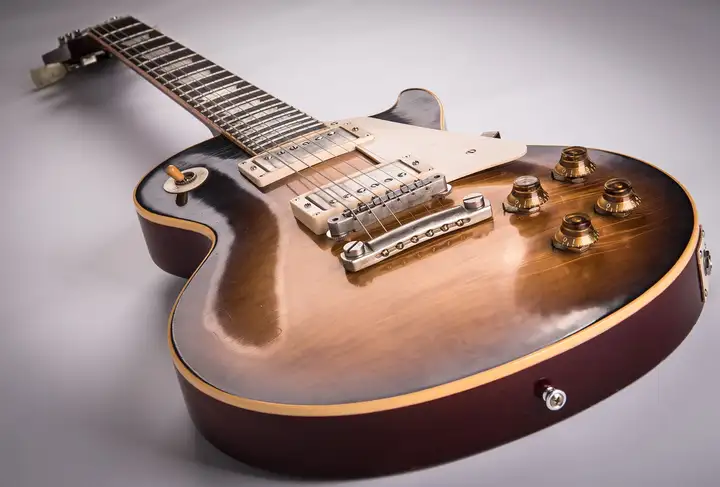
The Telecaster also eliminated the carved top, a type of arched surface similar to a violin's soundboard. Traditionally, this would involve carving and polishing with chisels, requiring skilled woodworking. Newer methods might use a series of templates and bakelite to mill the carved top before sanding. Regardless of the method, it's certainly more complex than the Telecaster. If you look closely at the Telecaster's body, you'll see it's almost entirely a grooved wooden board. Furthermore, the Telecaster lacks the ergonomic curved back of the Strato, saving another step in the manufacturing process.
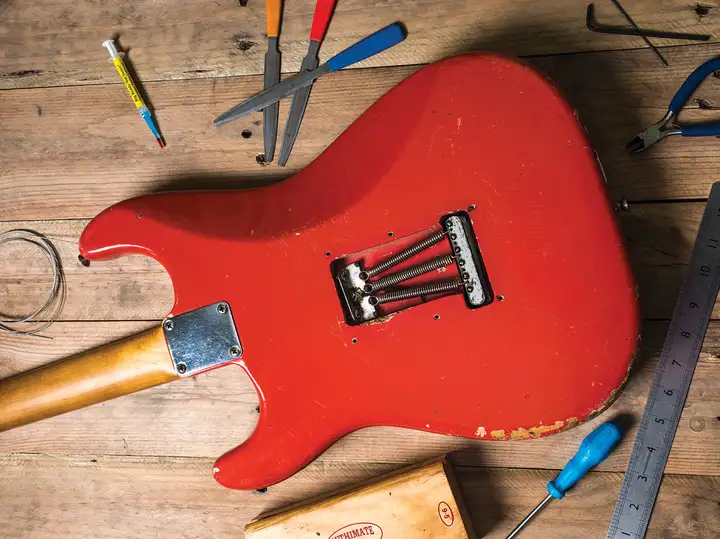
In addition, Telecasters typically do not require veneers or floating bridges, further reducing the difficulty of construction.
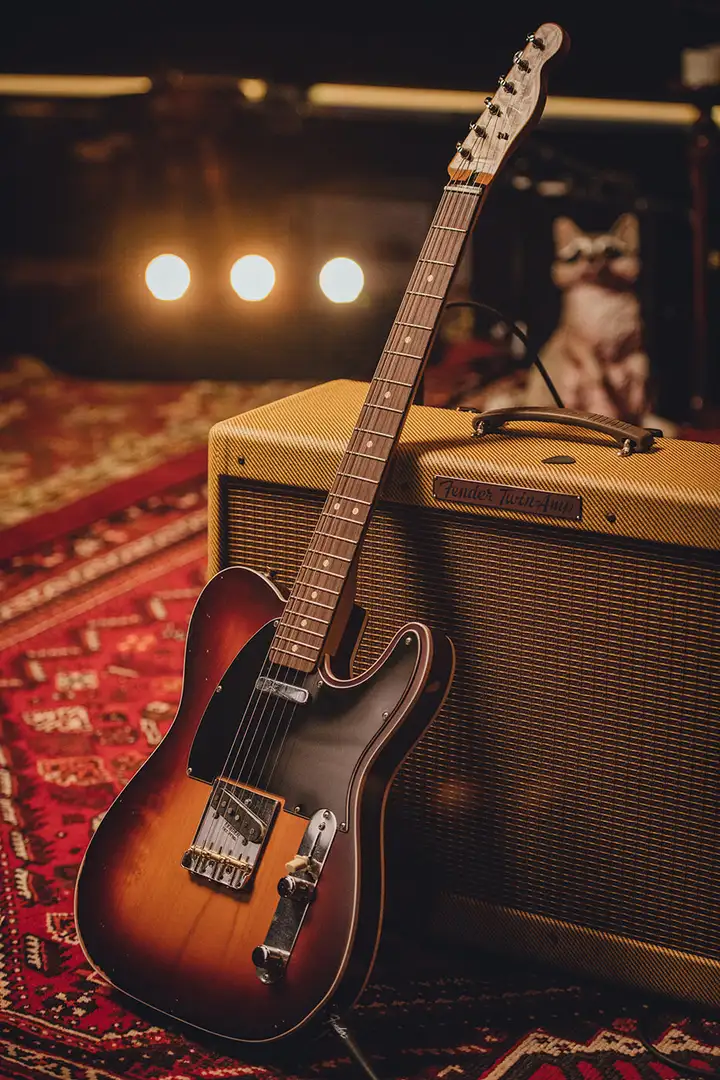
Despite its simple structure, Tele has shaped the sound of a generation of popular music and has been widely used in various music styles, making it a model of the "Less is more" design aesthetic.

In short, there is a vast amount of information on the internet, and as long as you make good use of Google, you can solve most problems.
Timber selection
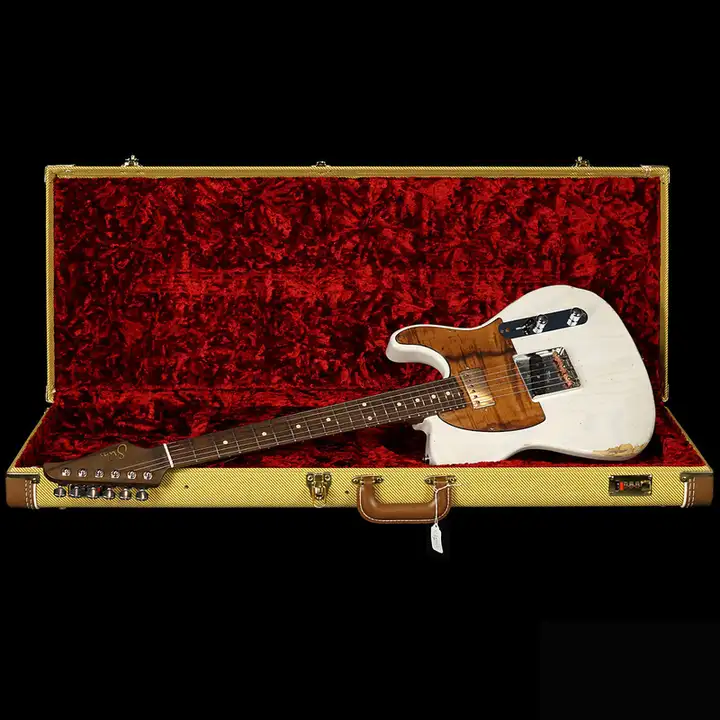
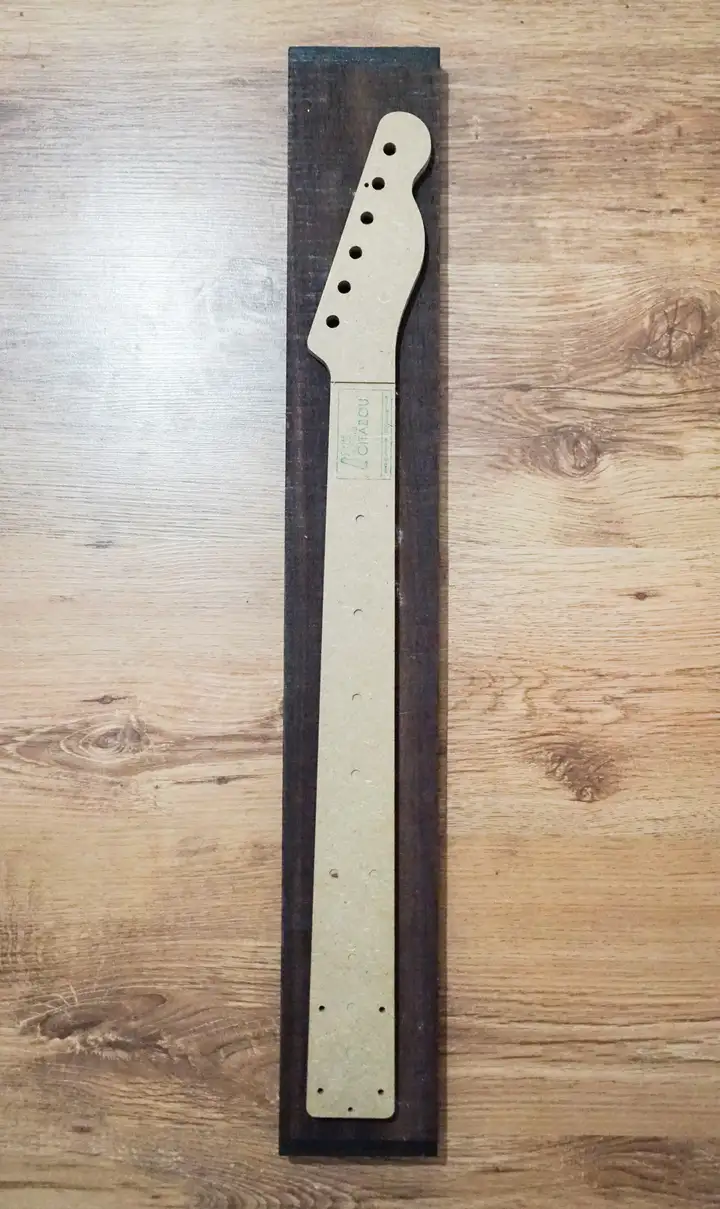
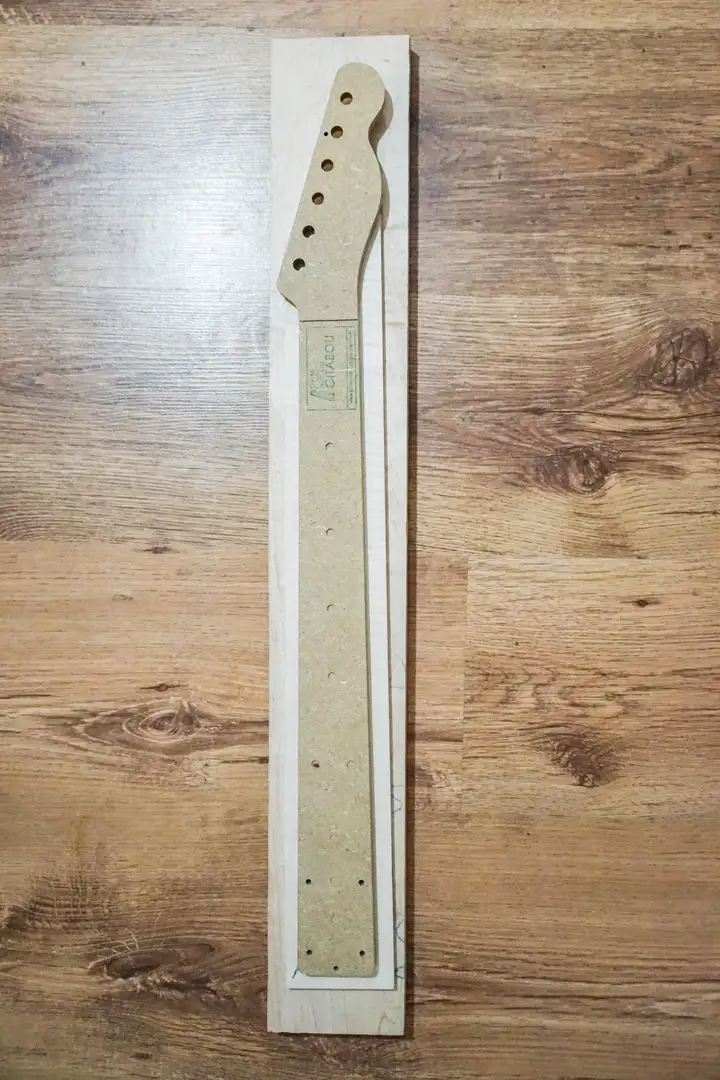
After deciding to make a Telecaster-style guitar, I found a reference material: a Suhr that I had seen on Taobao a long time ago. It had a one-piece rosewood neck, a figured Koa pickguard, and was finished with a translucent lacquer and an aged look, making it very unique.
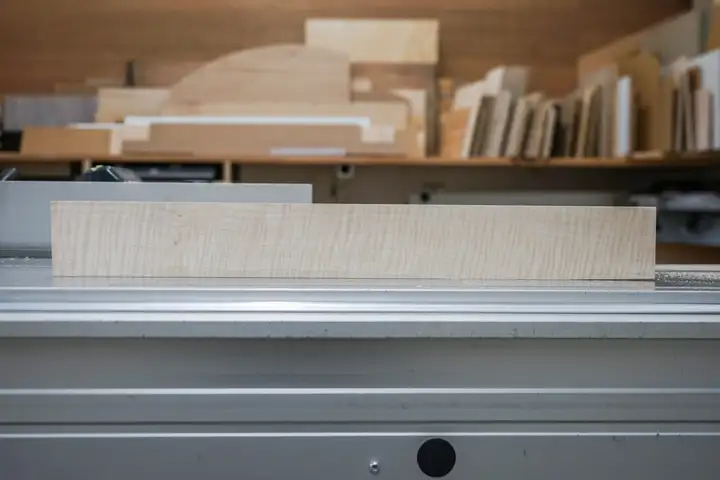
Telecaster guitars primarily use ash and alder. The Suhr example above uses North American swamp ash, which has a beautiful grain and is suitable for translucent or sunset finishes. However, due to floods and pests, swamp ash is becoming increasingly scarce and will gradually disappear from guitar making. It's also quite expensive now, so considering cost, the more affordable alder was chosen. A two-piece set costs around €50.
The neck is mostly made of maple, while maple and rosewood are the most common materials for the fingerboard. This Suhr guitar uses an unusual single piece of rosewood. Since this German lumber supplier has a minimum order of €100, I bought two sets of neck materials. Besides a single piece of Indian rosewood, there's a piece of flame maple for the fingerboard and a piece of bird'seye maple for the neck. I haven't found suitable acacia for the pickguard yet. The total cost of the lumber was €142.
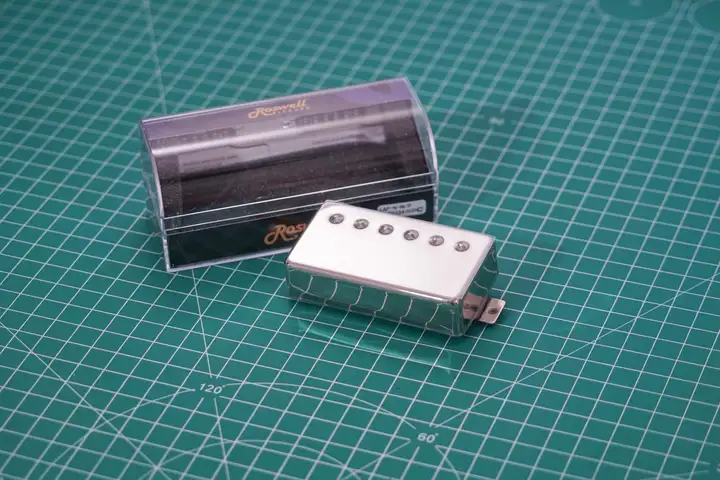
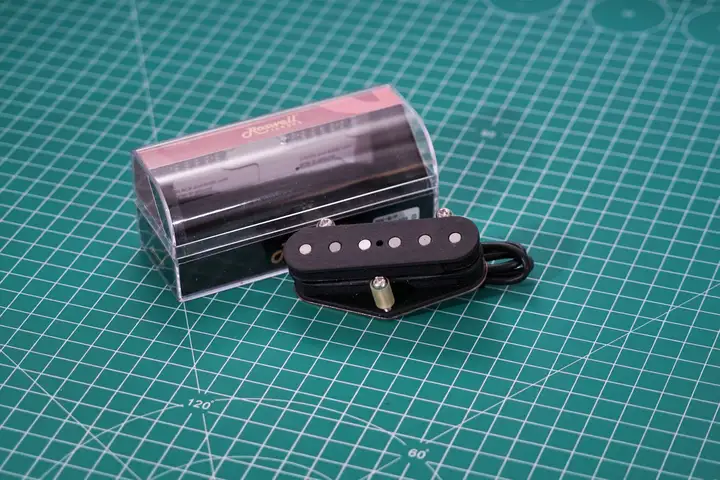
pickup configuration
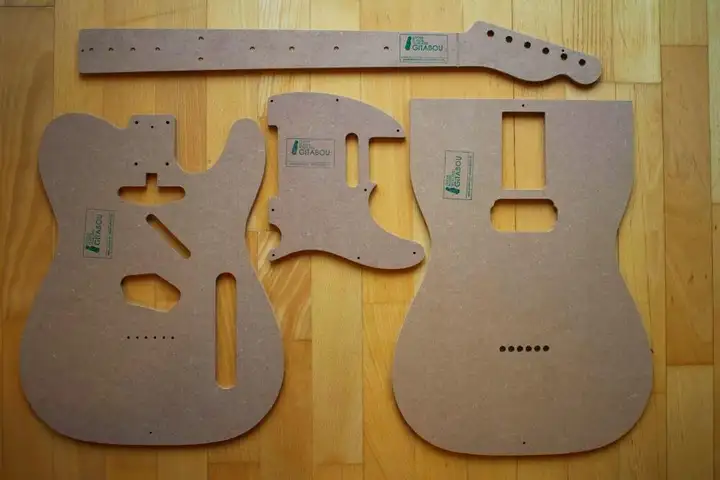
Bakelite milling template
Considering that most amateur enthusiasts do not possess CNC equipment, using a power mill for grooving and trimming remains the most feasible solution. When using a power mill to trim the body and fingerboard of a guitar, or to groove the pickups and control boards, a template (called a schablone in German) is typically used. These templates are usually made of MDF or acrylic and vary in thickness. The principle is as follows: after fixing the template to the wood of the guitar body, the wood is cut along the outline of the template. The milling cutter head or shank usually has one (or more) ball bearings that remain flush with the template itself, ensuring that the template shape is replicated without damaging it. The template can be fixed to the wood with double-sided tape, but a tape with too strong an adhesive should be avoided as it will be difficult to remove.
Besides using bakelite milling templates, some enthusiasts print out a life-size image of the instrument body/neck and then paste it onto the wood. While this can save costs, it requires a high level of skill and accuracy and is not recommended.
Hand tools
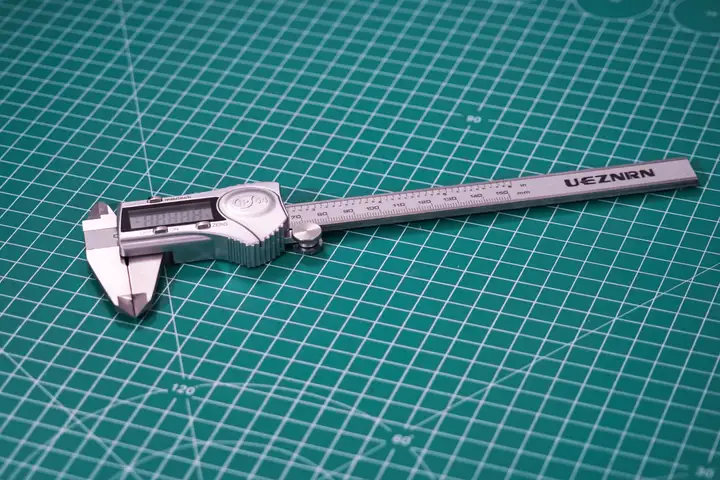
Vernier calipers: Building your own electric guitar is like challenging the precision of CNC machining with your own hands. You've already lost the competition from the start, so you have to take frequent measurements. These multi-functional vernier calipers can also measure groove depth and groove width, which is very convenient.
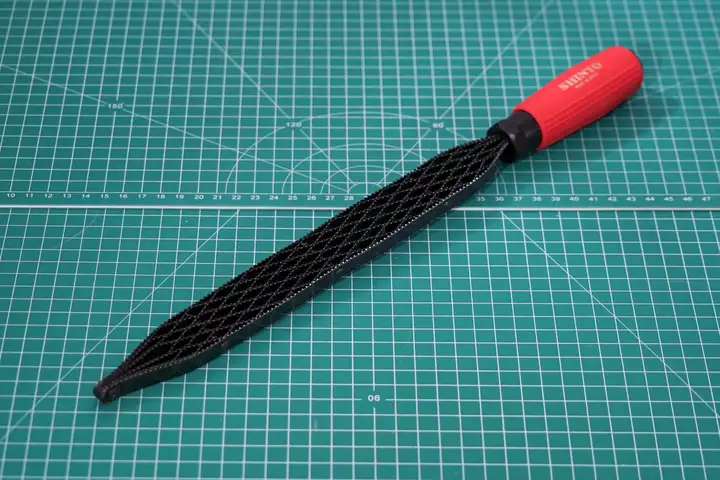
Rasp: A Japanese brand that combines many saw blades into one file. Many international enthusiasts use it; it's said to cut through wood quickly and is suitable for removing excess material after roughly outlining the guitar body with a band saw. It can also be used to sand the curved back of the neck. However, I bought one for €30 but haven't used it because the school has a more complete set of equipment.
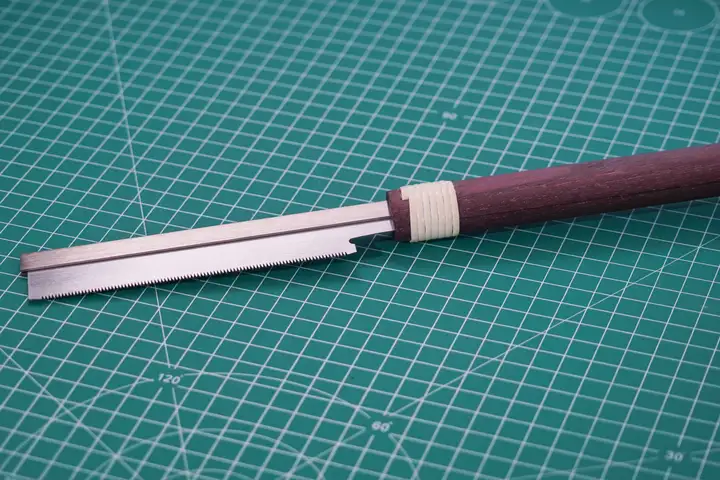
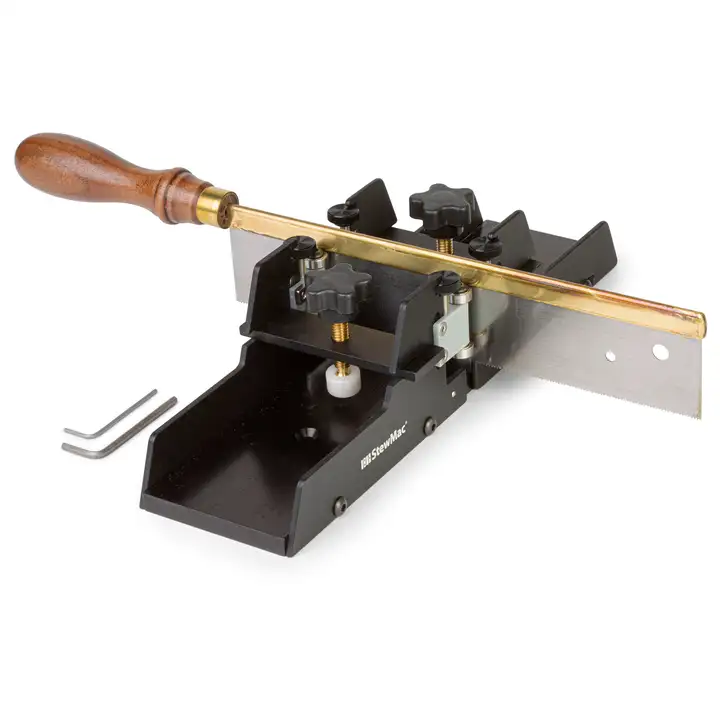
Fret Saw: Used for manually cutting fret grooves. In factories, this step is usually done using CNC machining, and some people use a table saw. However, if you don't have any of the above equipment, this may be your only option. It costs €44. Besides the one I bought, there is also one with a depth stop plate, which allows you to cut precisely to a specific depth.
Miter Box: Used with a wire saw. If you cut manually, the saw blade is likely to become crooked. The purpose of the miter box is to help ensure that the wire saw is straight. The knobs on both sides can fix the finger plate and prevent it from slipping.
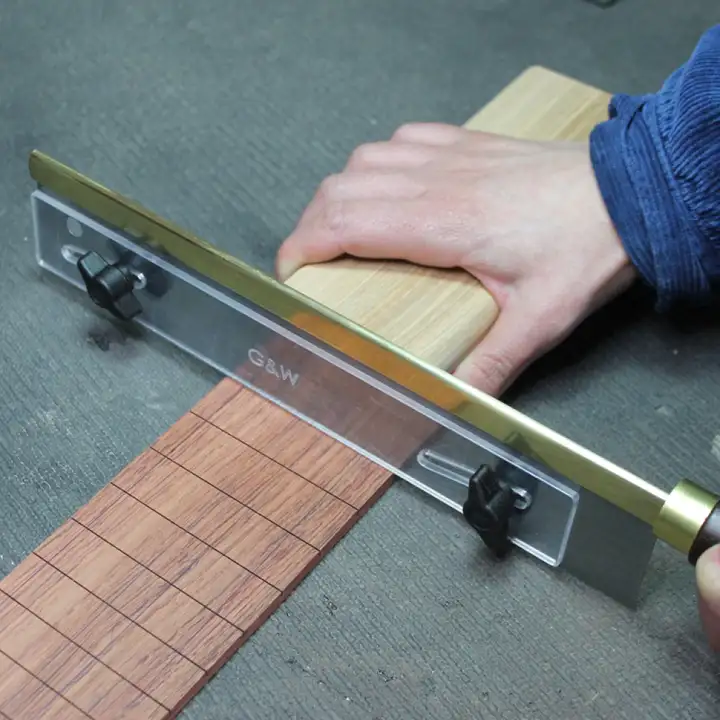
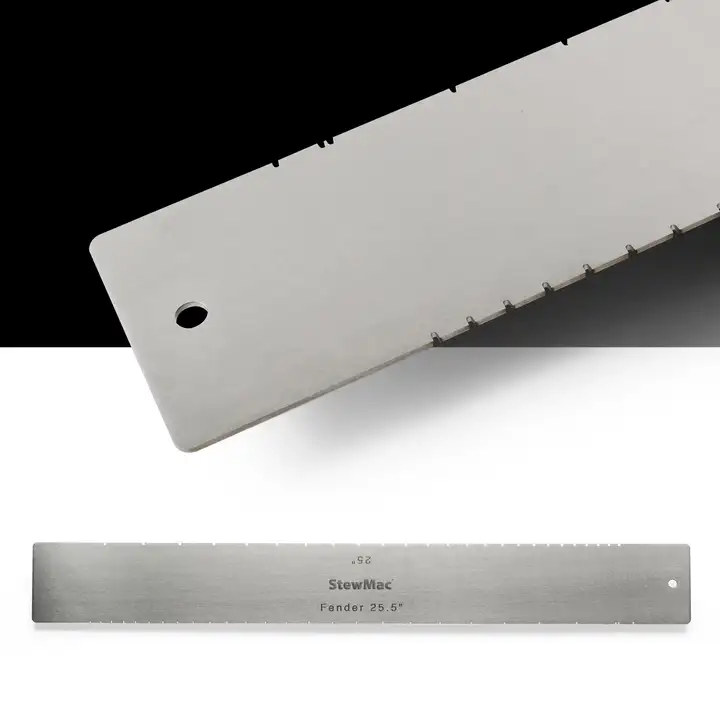
Fret Scale Template: This template can be used with a fret saw. Choose the appropriate scale based on the effective string length of the guitar you want to make. For example, most Fender guitars are 25.5 inches (648 mm), while Gibson guitars are mostly 24.75 inches (628 mm). The scale has a small notch that fits in the middle of the fret saw and sits under the fretboard, simplifying the process of measuring each fret individually.
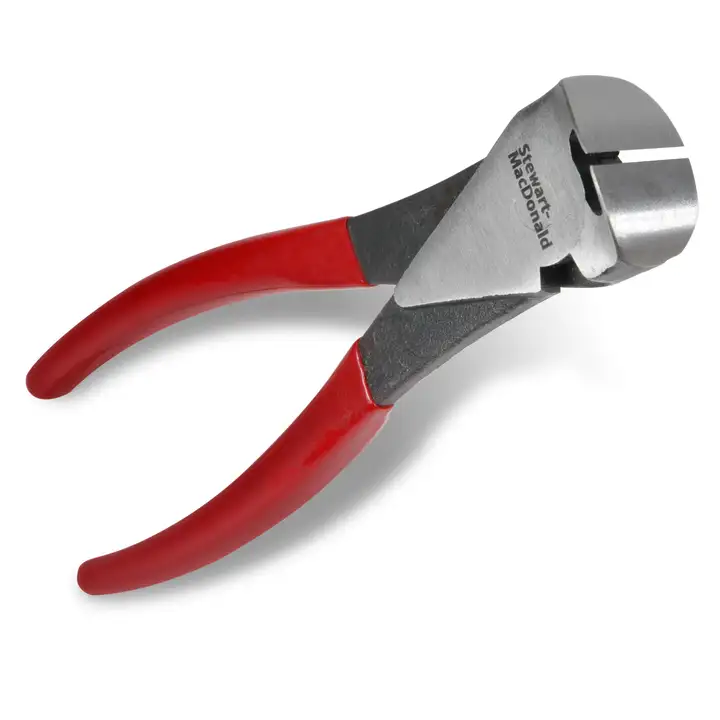
Fret Cutter: After attaching the fret to the finger plate, you can use fret pliers to cut off the excess part on both sides.
Fret Press: This presses filaments into the filament groove using pressure. It is used with a special press head and brass pressure block and is simpler and more efficient than a filament hammer.
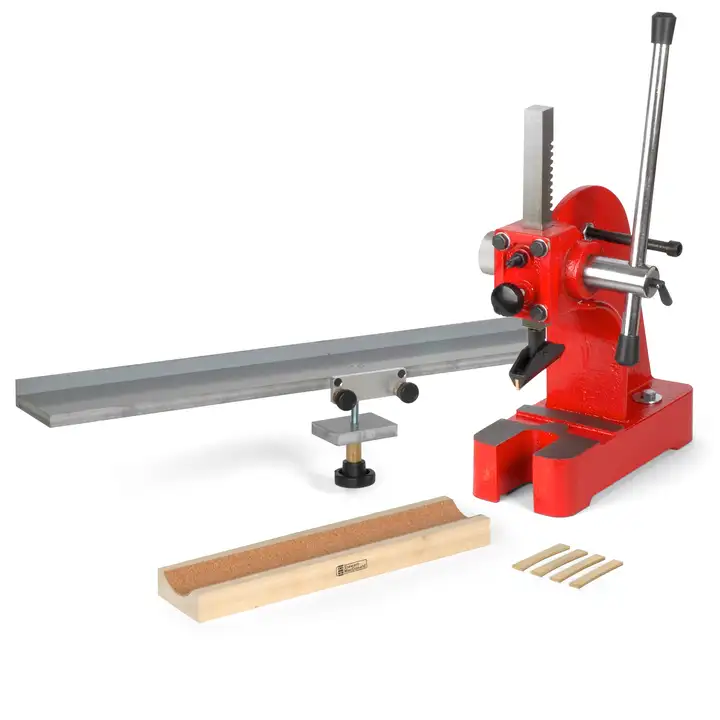
Fret Press Cauldron: In addition to the fret press machine, it can also be clamped in the chuck of the bench drill. It comes with a brass clamping block that corresponds to the curvature of the fingerboard. The most common one on the Telecaster is the 9.5-inch fingerboard curvature.

Fret Hammer: If you think the fret press is too expensive and you are confident in your ability to operate the hammer, you can also try using a fret hammer to hammer it in. Of course, it is easy to knock one end down and lift the other end up, which may damage the fingerboard.
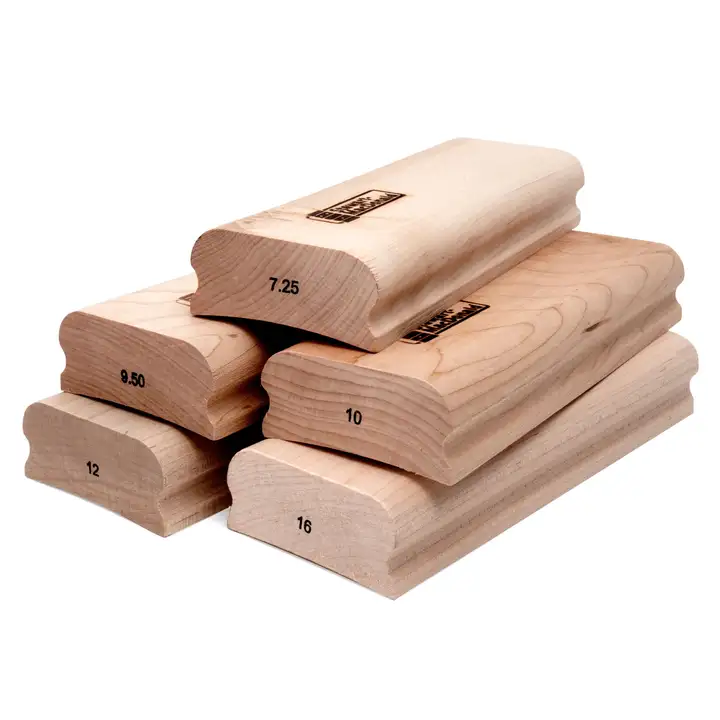
Radius Block: Depending on the radius of the guitar's fretboard you want to work with, such as 9.5 inches, you can sand the fretboard radius by attaching a piece of sandpaper to the bottom of the block.
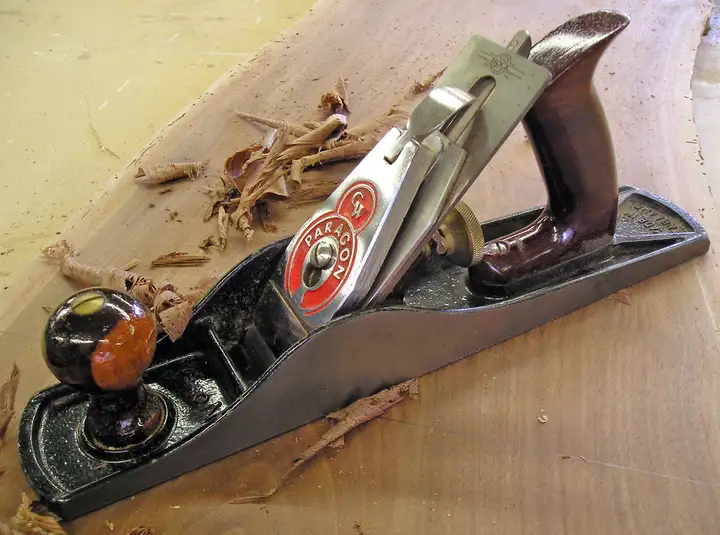
European-style plane /Jack Plane: If you don't have a planer, you'll need to manually plane the wood. Since the school has a planer, I haven't used this tool. A YouTuber suggested using a size 5 planer.
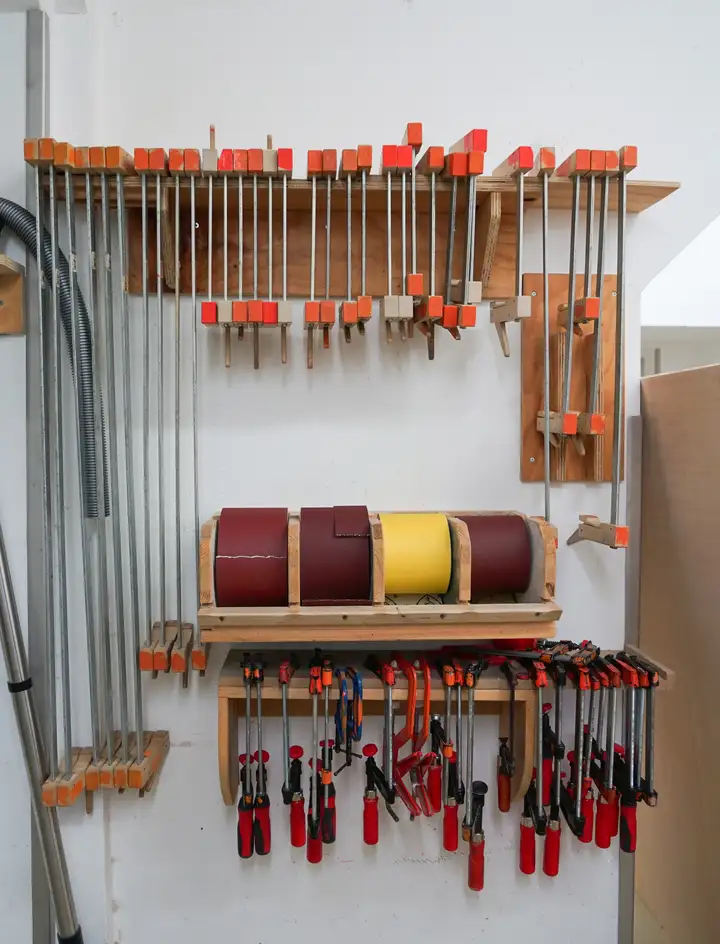
Woodworking clamps: Used to hold wood during the gluing process. According to the "woodworking clamps are never enough theorem", it is best to buy several of different sizes.
European-style marking gauge: Used to draw parallel lines, such as the center line of the fretboard or the headstock of a Telephone.
power tools
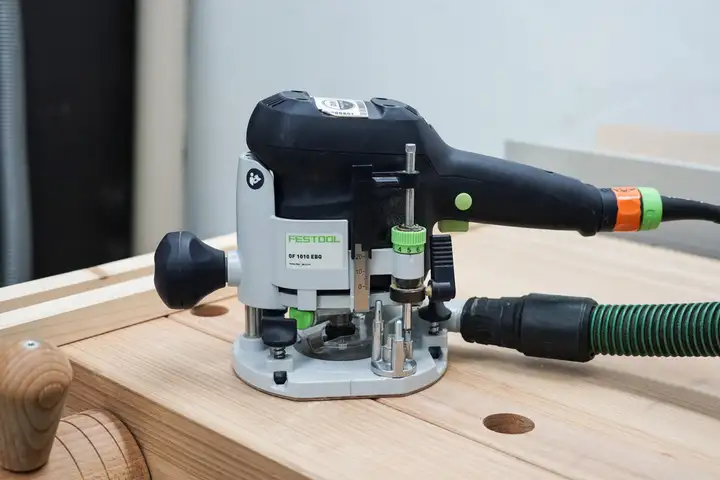
Router: One of the most important tools for building your own electric guitar. With different cutters, templates, and guides, it can be used for trimming, rounding, and grooving. There are handheld and benchtop routers. A benchtop router is essentially an inverted router with the cutter head facing upwards, offering better stability and safety, but it's generally used for trimming and not for grooving pickups. For this, a more flexible handheld router is necessary because its extremely high speed makes it difficult to control and carries a certain degree of danger. It must be held with both hands at all times; otherwise, you may cut the wood (or your hand). Wearing safety goggles and earplugs is also recommended.
Common types of end mills
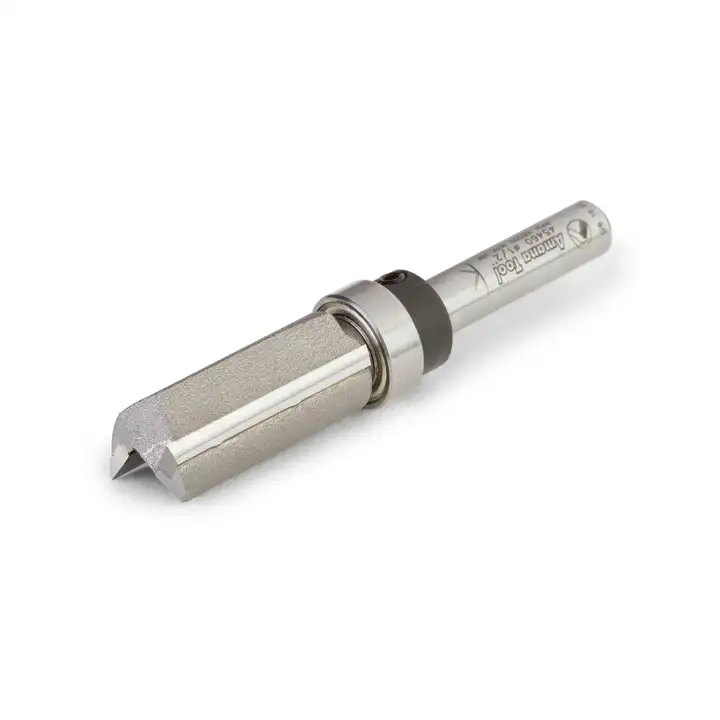
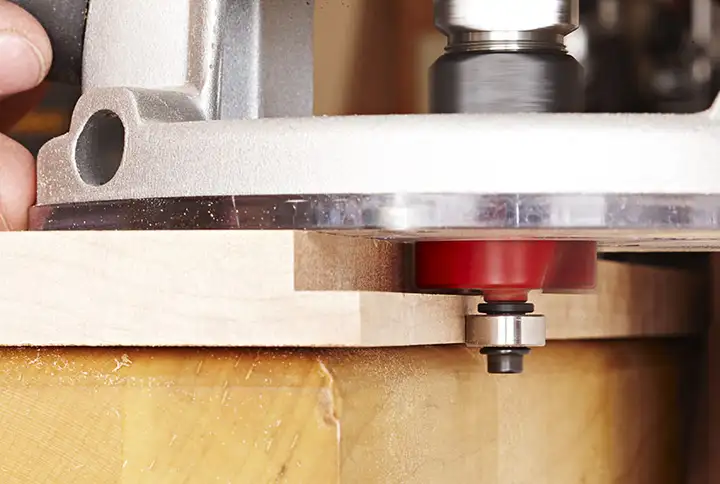
Flush Trim Bit: A flush trimmer is characterized by a ball bearing in the tip and shank (or both), which allows it to mill wood along the shape of a template.
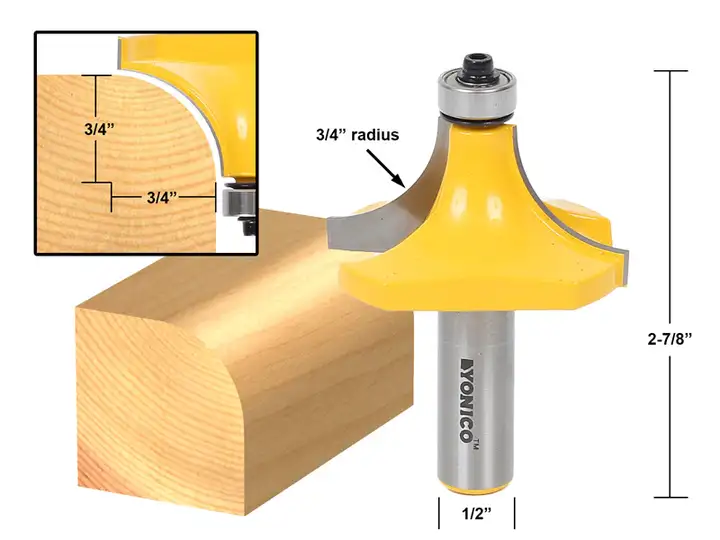
Round-over bit: Used to round the edges of the instrument body, such as on Stratocaster-style instruments.
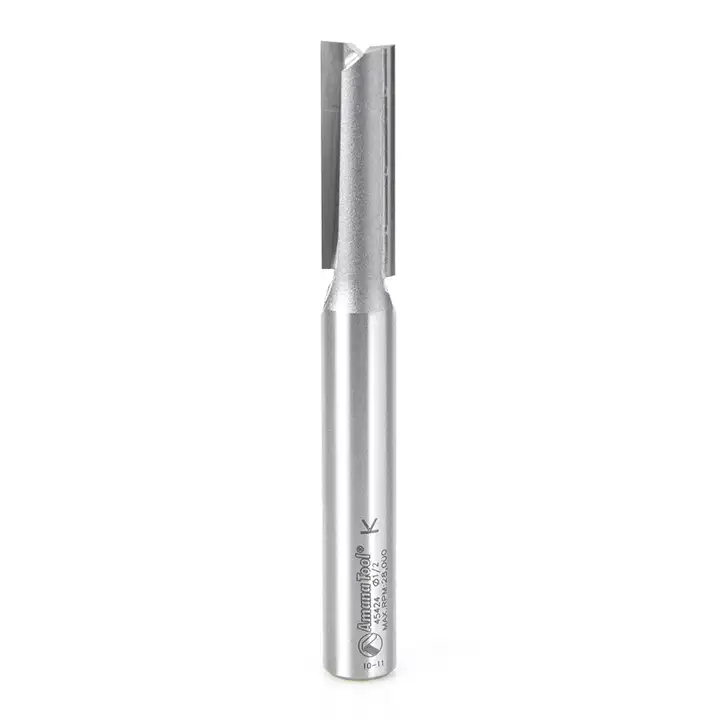
Straight Bit: It looks like a trimmer without a bearing and is generally used in guitar making to cut grooves in the truss of the neck.
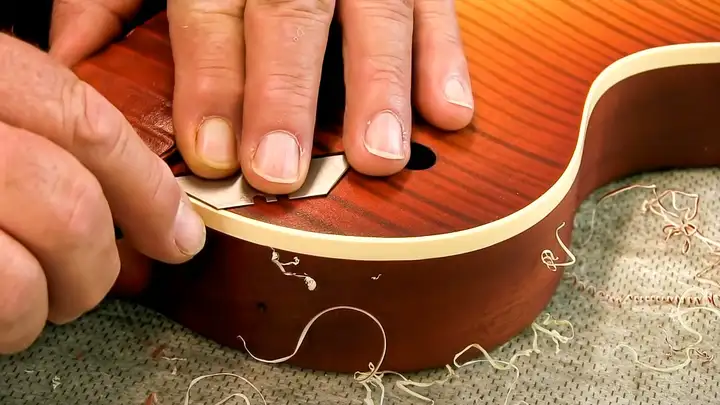
Rabbeting Bit: Used for making edging. It also has a bearing, but the bearing diameter is smaller than the bit diameter. The difference can be used to mill a groove along the body of the instrument. This groove can be used for subsequent edging work, but it will not be used in this Tele case.
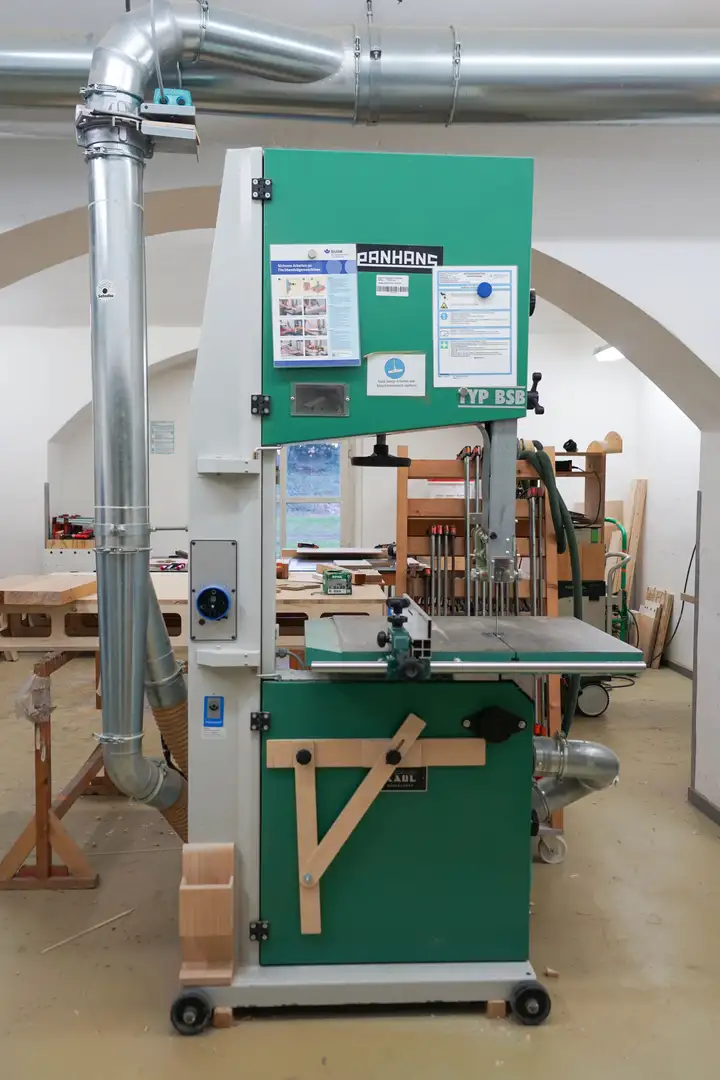
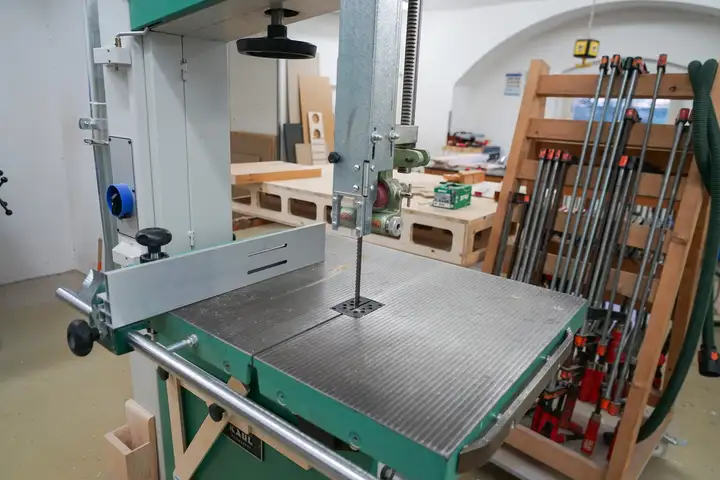
Bandsaw: Used for rough cutting the outline of the instrument body and neck. If unavailable, a Japanese saw or an electric jigsaw can be used as a substitute, although it is more difficult to operate and takes more time.
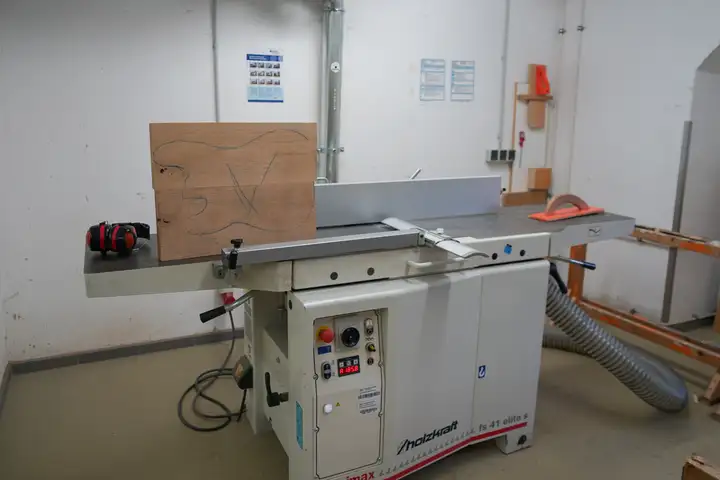
Surface planer & thicknesser: A surface planer is used to smooth the edges or surfaces of wood, while a thicknesser is used to plane wood to a certain thickness. The one I'm using is a combined surface planer and thicknesser.
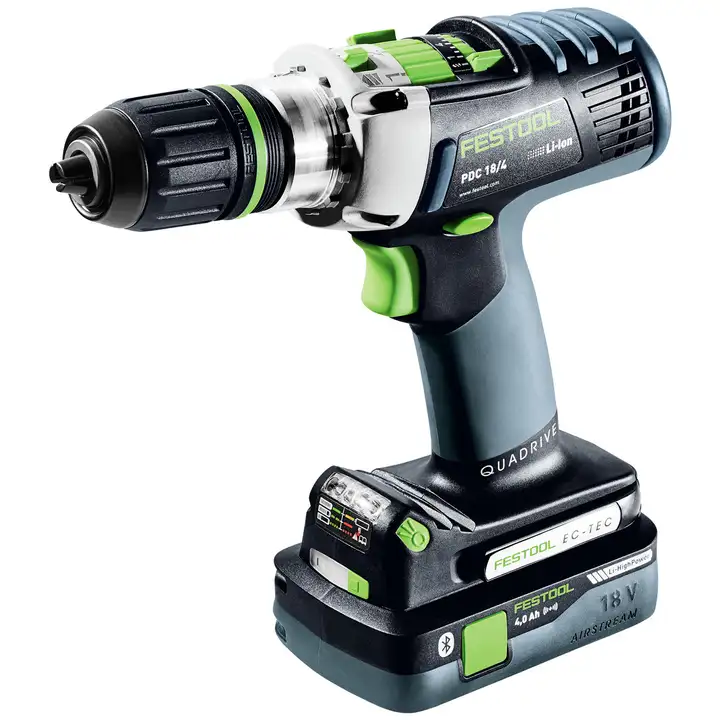
Power drill: It is frequently used when installing screws and drilling holes.
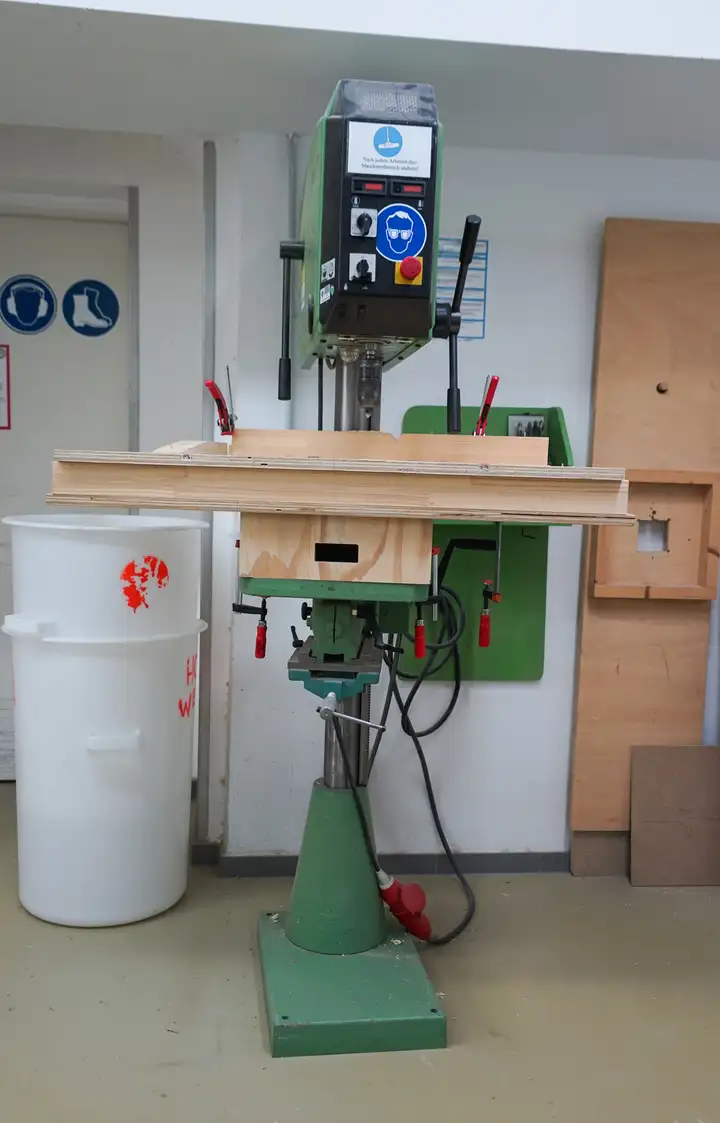
Drill Press: More stable than a hand drill, it is convenient for drilling vertical holes (such as grooves for fingerboard dots). When used with a hole saw, it can be used to cut grooves in the guitar body. When used with a fret press head, it can be used as a fret press machine.
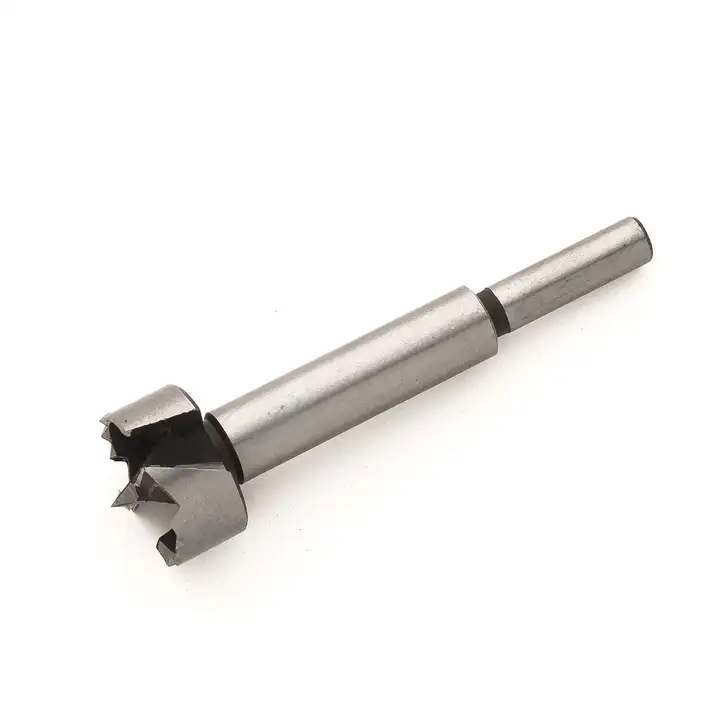
Forstner Bit: Commonly used to drill large holes in wood without drilling through.
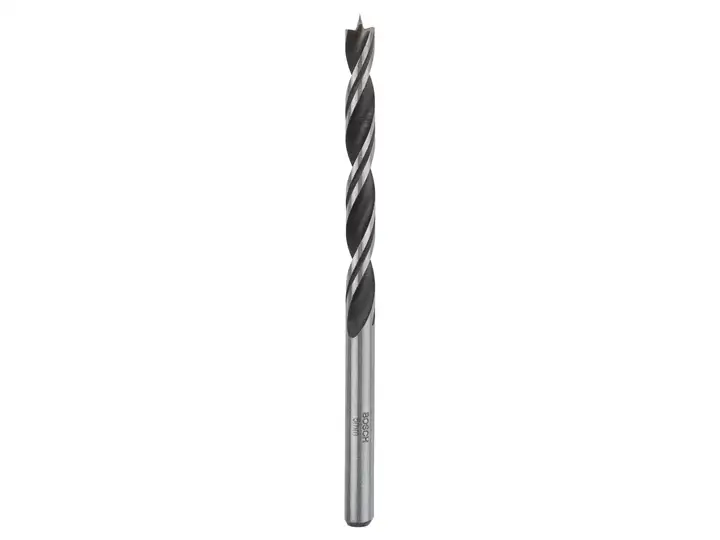
Brad-Point Drill Bit: A woodworking drill bit with a pointed tip that helps with positioning, but it wears out more easily than a regular twist drill.
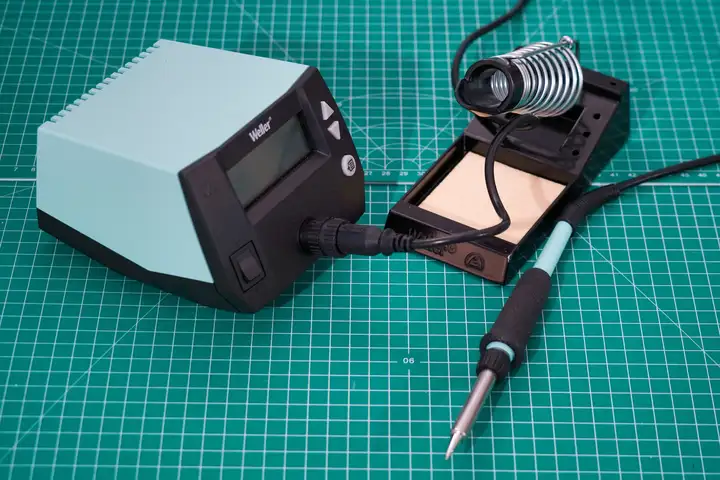
Soldering Station: Used for soldering guitar circuits. Beginners should choose a temperature-adjustable one.
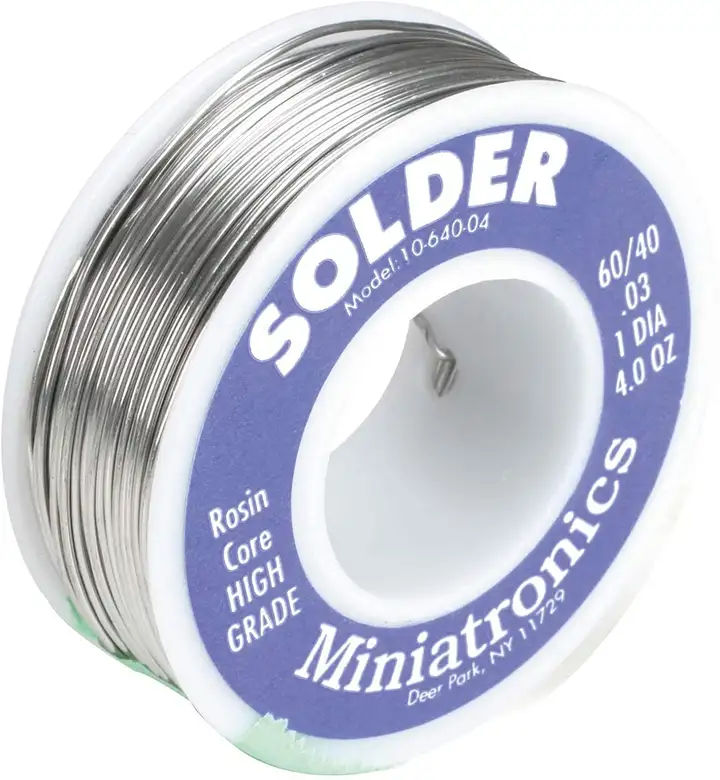
Solder: Generally, lead-containing solder wire with a 60/40 rosin core is used.
Hardware and circuits
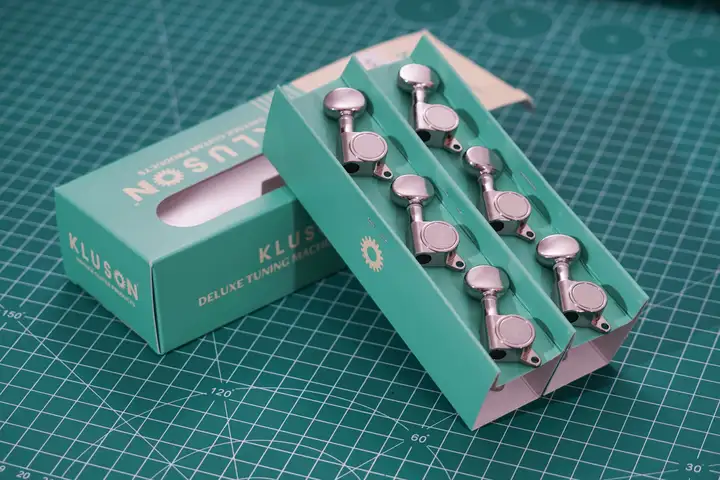
Tuning knobs: Original tuning knobs are quite expensive. I bought one from a brand called Kluson, which used to be a supplier for manufacturers such as Fender and Gibson.
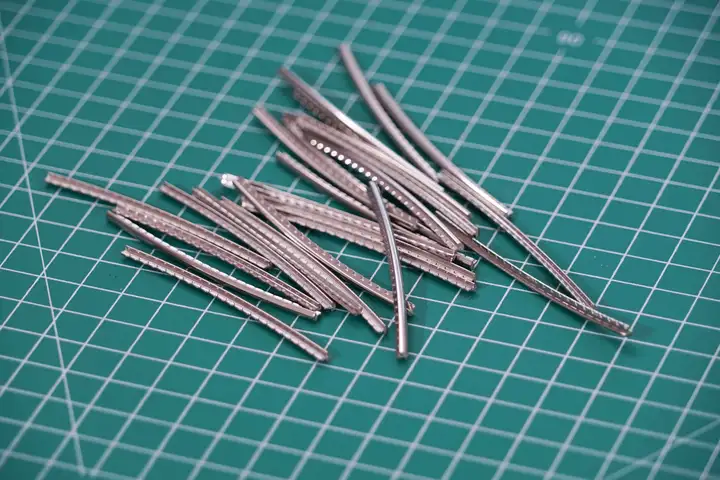
Fret: Buy pre-bent filaments with the corresponding curvature; otherwise, you'll need to buy an extra tool.
Nut: You can buy a pre-cut nut or buy a blank one and cut it yourself. Tele uses a nut of about 43mm.

Truss Rod: Used to be embedded in the neck of a violin to adjust its curvature.

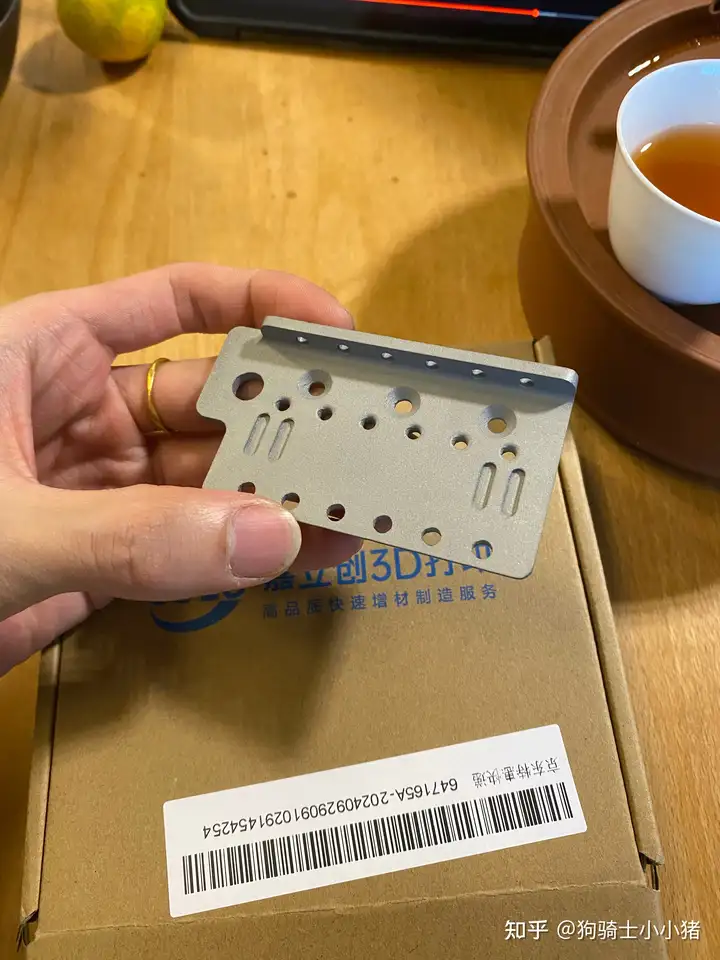
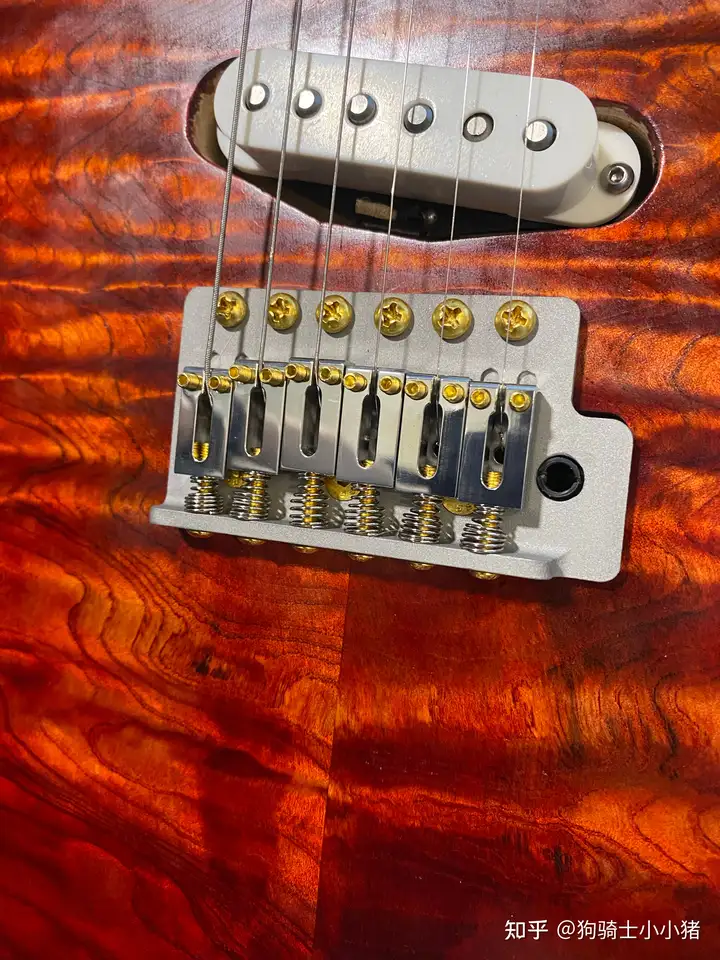
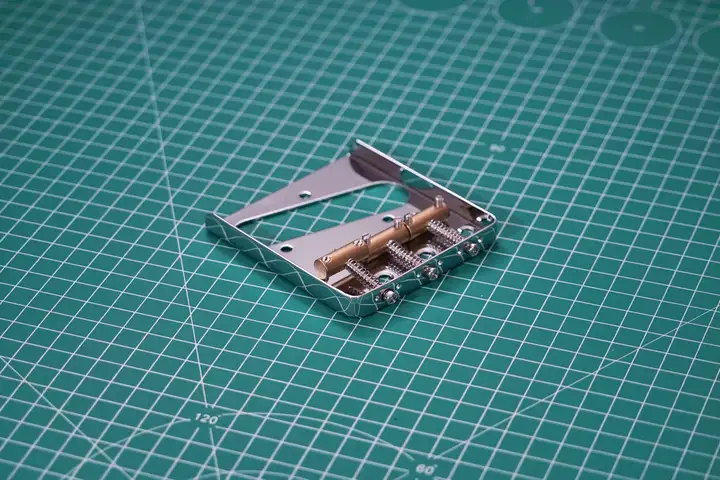
Bridge: This goes without saying; you need to consider the effective string length when installing it.
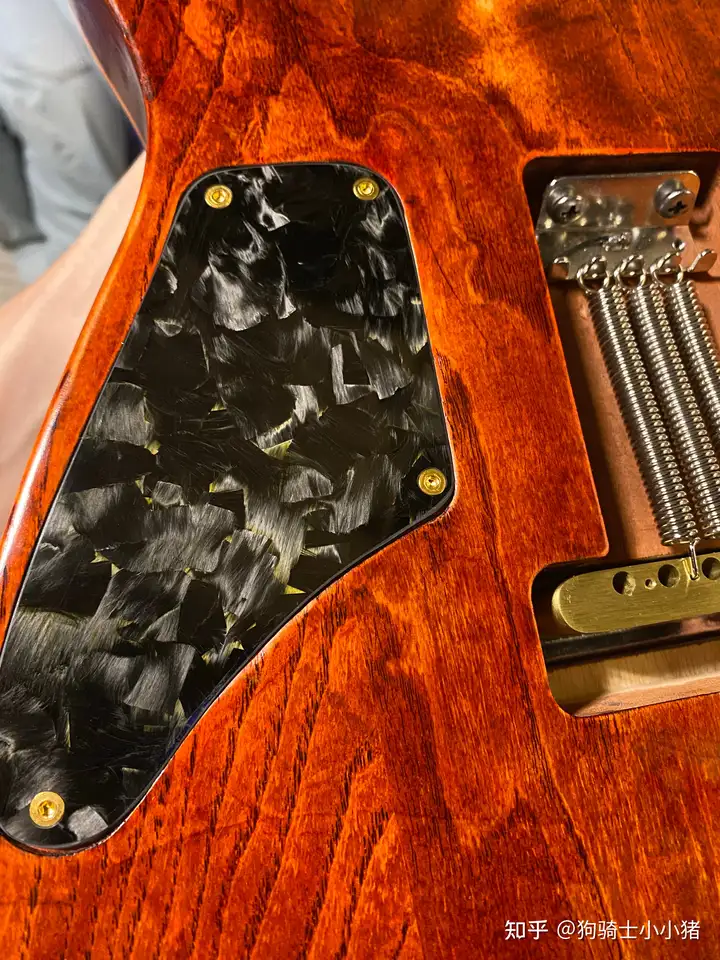
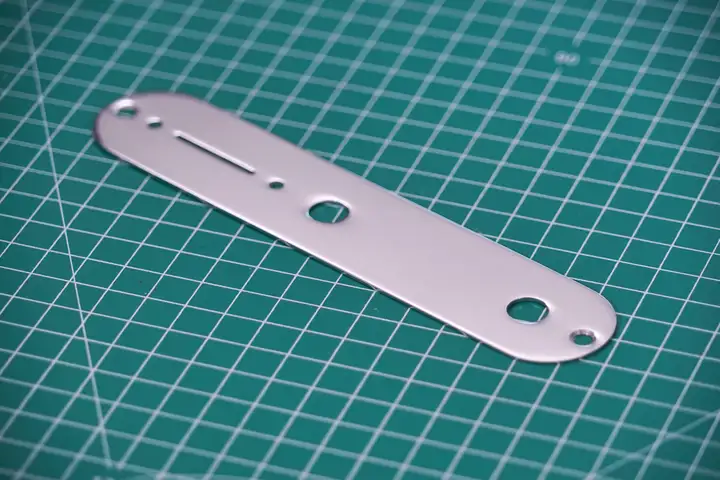
Control Plate: Used to mount potentiometers, tone and volume knobs, toggle switches, etc.
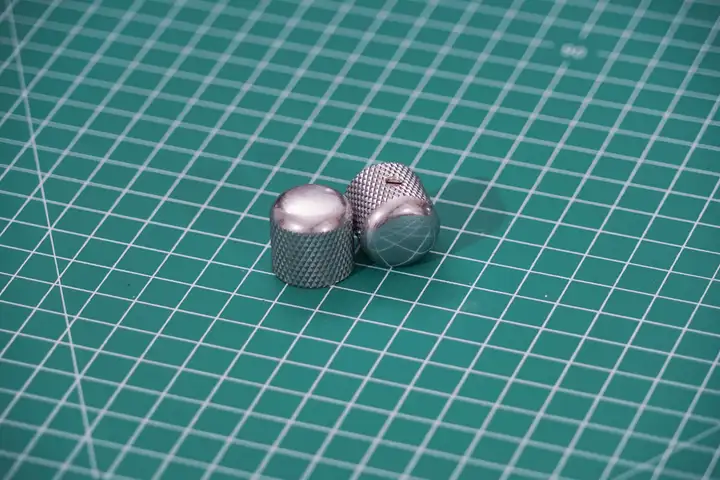
Knob: As the name suggests, it's a cover for the knob. I bought an antique-style one.
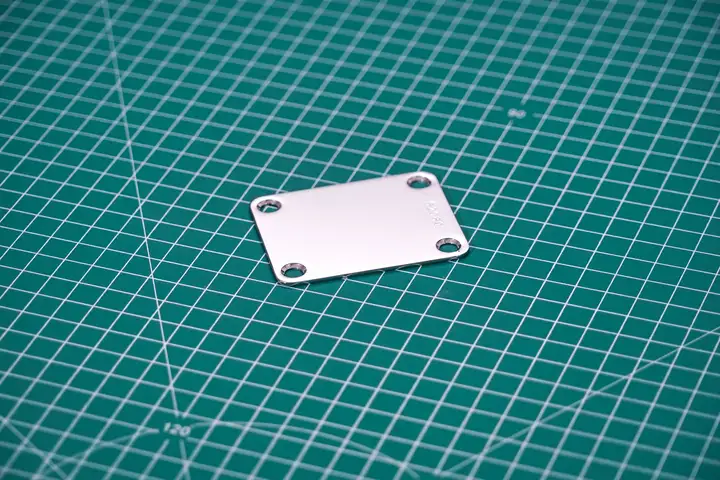
Neckplate: I initially bought a cheap one to save money, but when it arrived, I found that it didn't come with any screws. So I spent €6.50 to buy four genuine Fender screws. This price is incredibly generous; it's like being robbed and they're still throwing in a few screws.
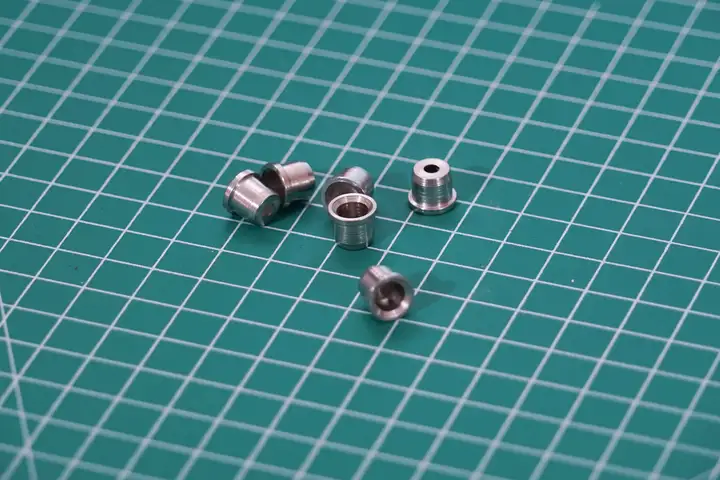
String ferules: These are typically used on solid-body electric guitars without a tremolo system. They are mounted on the back of the guitar body and are used to secure the strings.
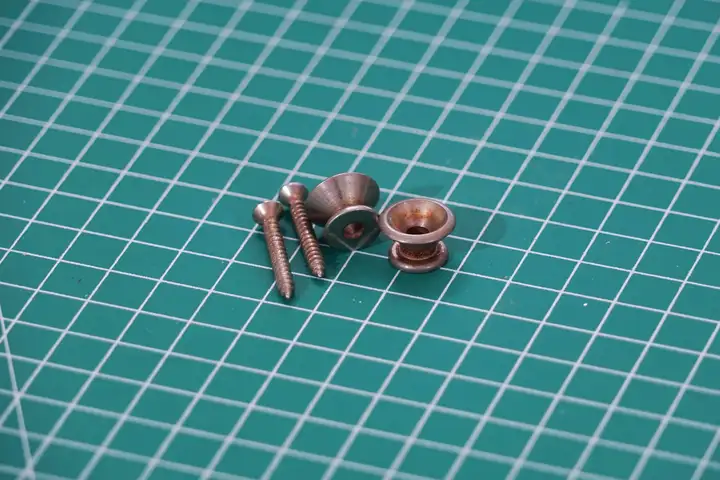
Strap Button: As the name suggests, it is used to attach the shoulder strap. I bought a vintage version from Fender.
Capacitor: The higher the capacitance, the darker the tone, and vice versa.
Potentiometer: Located below the tone/volume knob and control panel, this is the potentiometer. It generally comes in 250K and 500K versions; the 500K version has a brighter tone and is commonly used on guitars like the Les Paul with its rich, full-bodied humbucker tone. Fender's Strato and Tele guitars mostly use the 250K. For Tele guitars, you'll need to buy two.
3-Way Switch: Used to switch pickups. Telephone usually has 3 channels, while Strat usually has 5 channels.
Making the body of the instrument
The first step is to level the wood. This requires using the planer function of a multi-functional planer. Determine the surfaces to be bonded and plane them flat until there are no gaps when the two pieces of wood are stacked. You can check the wood against the light; if light filters through, it means the wood is not completely flat, which will affect the subsequent bonding process.


Next, apply wood glue to the jointed surfaces of the wood. Do not apply too much, otherwise it may overflow, and the area where the glue adheres may affect the subsequent painting process. Use three long and two short wood clamps to hold the wood in place, with the two side clamps used to prevent the jointed surfaces from shifting. Then let it sit for 24 hours to allow the glue to cure.
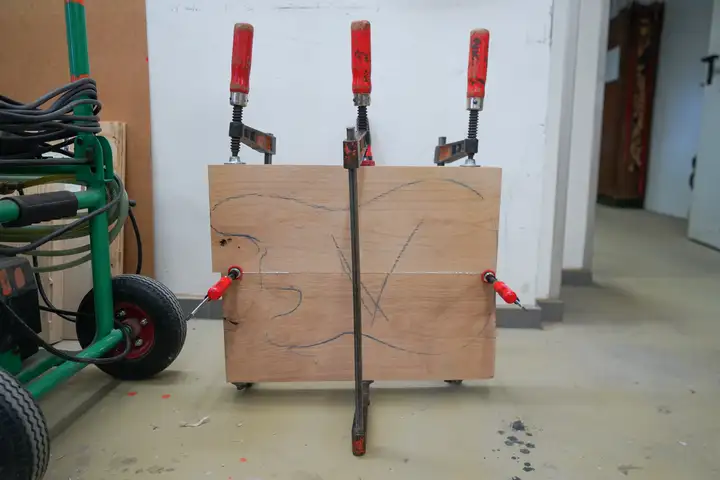
After curing, use a plane (or scraper) to scrape off the excess glue, and then use the planer's pressure planer function to plane to 45 mm, which is the final thickness of the Telecaster. When planing, do not go all the way at once (for example, planing directly from 50 mm to 45 mm), but plan a little bit at a time, going through several times.
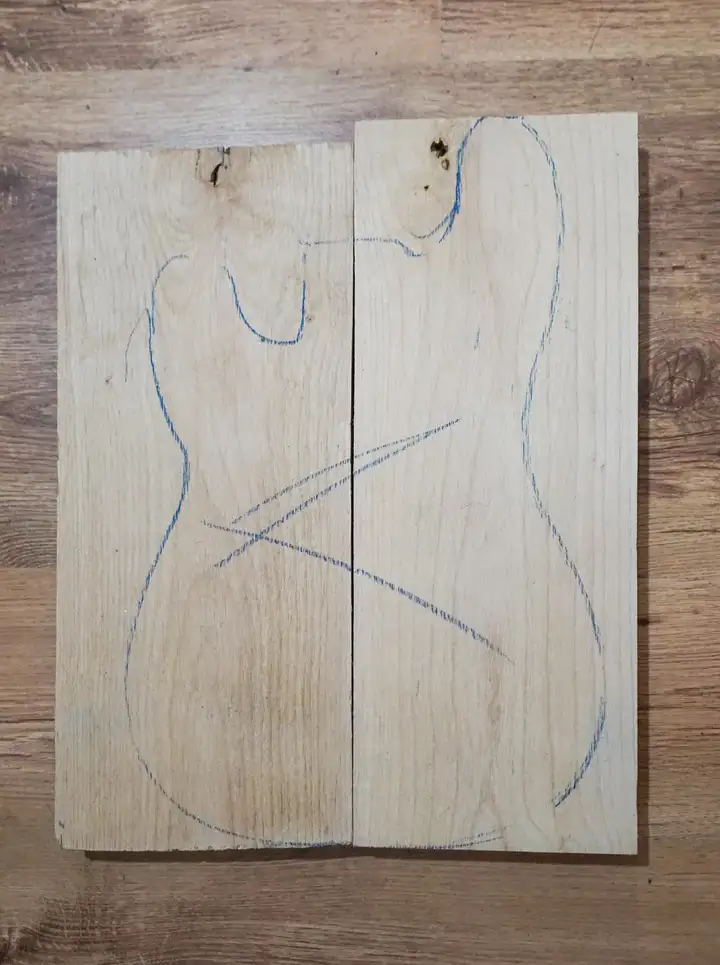
Place a template on the planed wood, aligning their center lines. Outline the instrument body with a pencil, then cut it with a band saw. You can first cut some horizontal straight lines outside the outline; this will cause the wood blocks to fall off automatically as the band saw passes over them, preventing the saw blade from getting stuck. Leave a two-millimeter margin from the edge when cutting; avoid accidentally cutting directly into the outline.
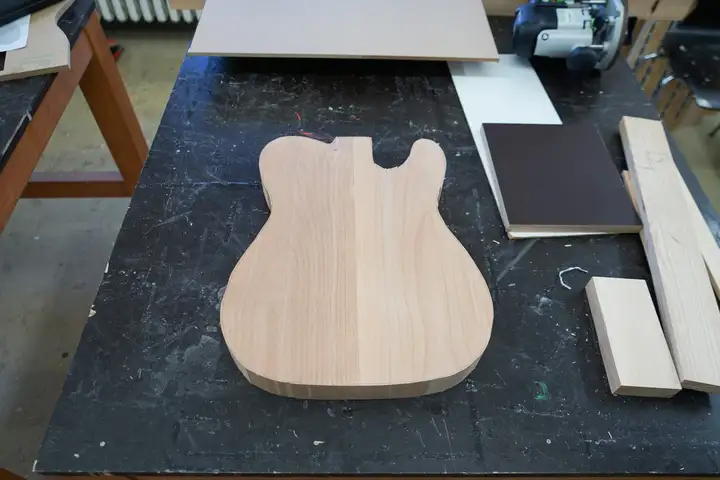
Next, the template needs to be fixed to the wood of the instrument body. You can use nails to attach it to the neck joint, where it will be cut off later. Alternatively, you can use double-sided tape, but don't use a very strong adhesive, otherwise disassembly will be extremely difficult.
When trimming with a handheld or benchtop power mill, always use a trimming blade with a bearing, and ensure the bearing is flush with the template; otherwise, disastrous results will occur. Do not move the blade too slowly during trimming, otherwise the high temperature generated by the high-speed friction of the blade can easily burn the wood, resulting in blackened edges that will make subsequent sanding more difficult.